
I’m a geek, I spend a good 50% of my life behind screens reading code and trying to decipher articles full of jargon and abbreviations. Being the naive individual that I am I thought that the world of BBQ food was going to be simple, straight to the point and easy to understand.
Once I had decided to invested in my setup I joined a few groups on Facebook and ‘BOOM’, people were chucking terms at me like ‘Minion’, ‘Snake’, 3-3-2 . . . I was lost!
So here I am, writing a brief article on the subject I was first faced with . . . how do you set up the fuel?
What I originally thought
Coming from a background of disposable BBQ’s I was used to lighting a single match and setting fire to the paper to ignite the crumbs of charcoal found in the foil tray. That was it . . . ten minutes later I could be found burning sausages, coughing from inhaling smoke and trying to stop my eyes from watering. Life was great! . . . or so I thought.
So, what did I think was going to happen in this new world? Simple, buy some charcoal from the local garage, chuck in some fire lighters, cover with the briquettes . . . light . . . cook!
Needless to say, I was wrong!
So, what’s the best set up?
Hold fire! (see what I did there?) . . . what I’ve personally experienced during my short time cooking food in the bullet smoker is that there isn’t a single set up that you can rely on for all cooks.
Fuel aside (I’ll cover this another day), the setup I use depends on the food i’m cooking and if I’m going for something quick (Hot and Fast) or smoking over a few hours (Low and Slow).
The Minion Method
For:
Larger joints of meat (E.G Pork Shoulder)
Setup:
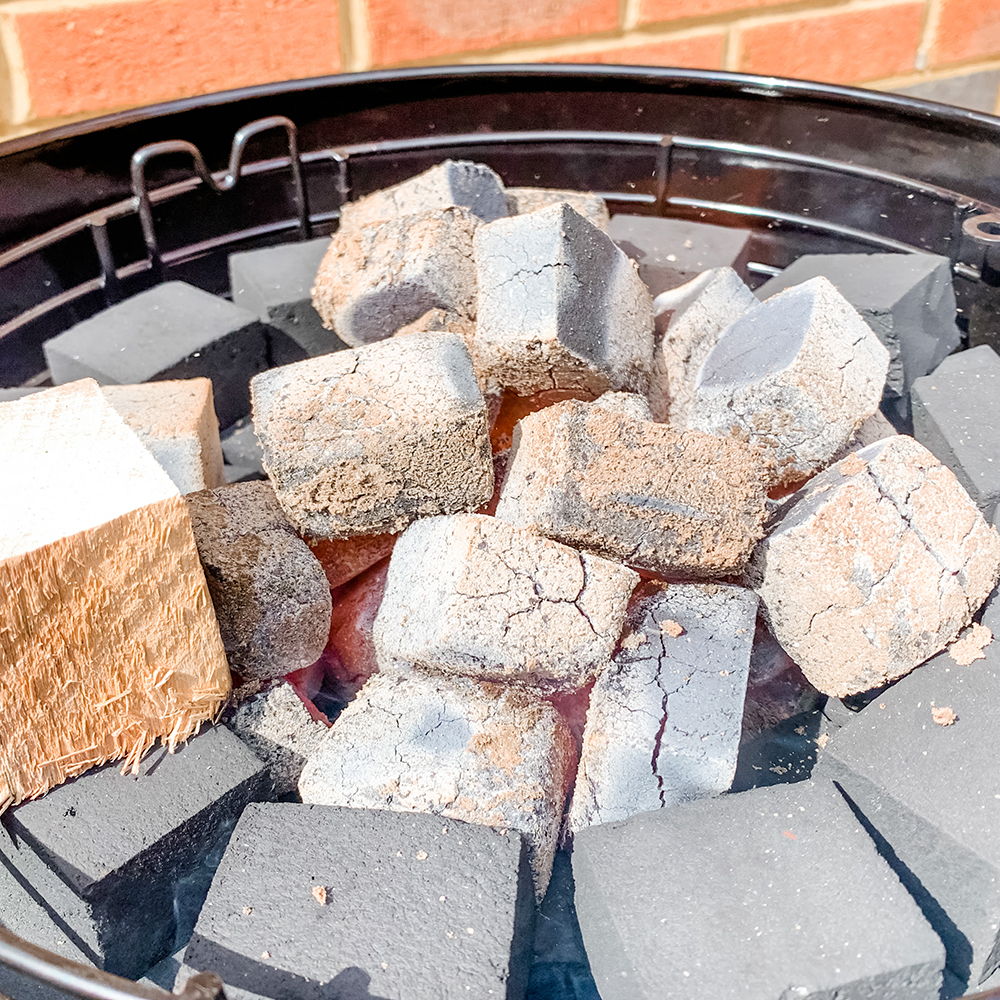
I like order . . . although you can simply chuck some unlit fuel in the basket and then create a void in the centre . . .I tend to go for something slightly tidier!
These days (now i’ve done a few cooks), I tend to create two rings of fuel around the inside of the fuel basket. The outer ring double height and the inner one a single layer. Then around the single layer I periodically place the odd briquette just to built it up a little.
I then place my wood chunks of choice (again, an article for another day) on the unlit fuel ready to burn throughout the early stages of the cook.
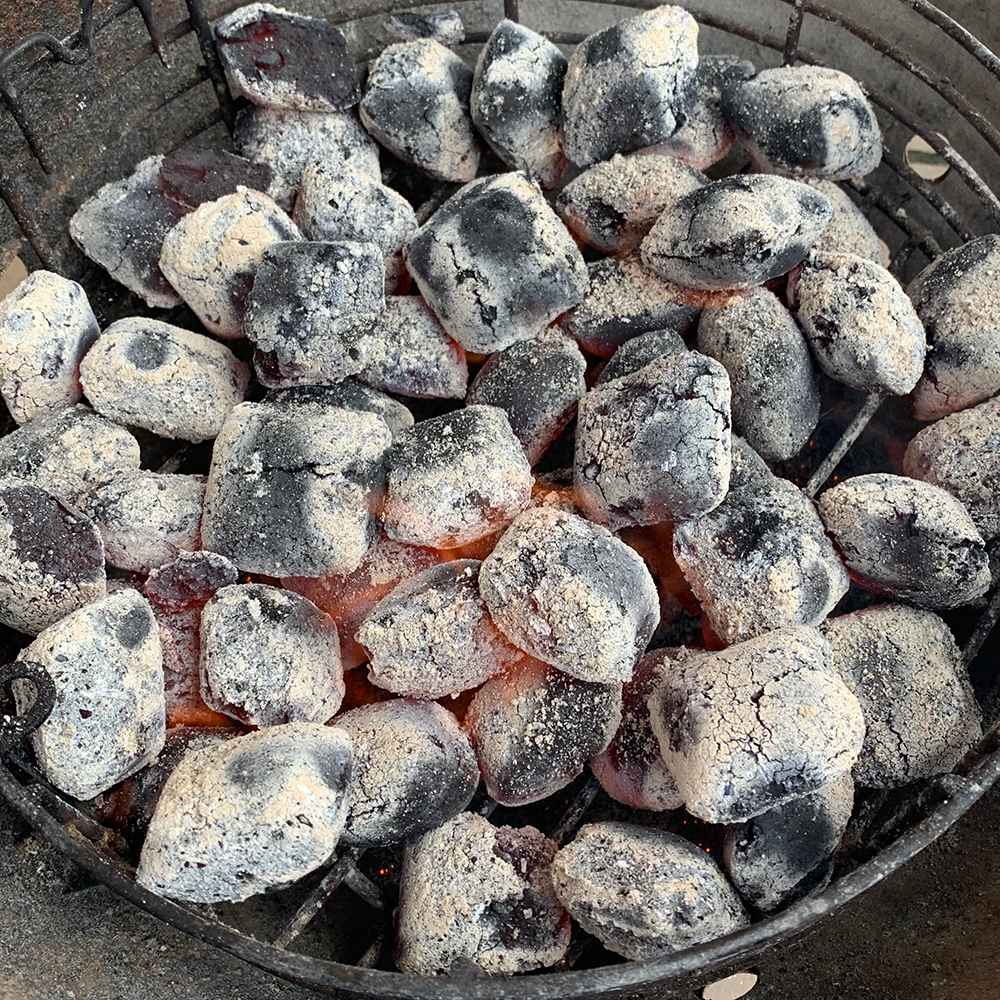
Finally I light around 15 briquettes in the chimney starter and then pour centrally into the basket.

The Snake Method
For:
Really ‘LOW & SLOW’ (E.G Beef Short Ribs)
Setup:
I tend to use this setup when I want to bring the temperature down a little more and run around 225f. Also, I have found that when I use this setup I experience less temperature fluctuations and feel more confident walking away and letting the smoker do its ‘thing’.
For this set up I build up a fairly chunky ‘snake’ around the inside of the basket . . ensuring that the head and tail are not too close (I’ve experienced an issue once where I ended up burning both ends at the same time . . . not great).
Once this has been done I place the required wood chunks on the first half of the snake as that’s when the smoke works it’s magic.
All set? Simply ignite a handful of briquettes in the chimney starter and place a couple at the head . . . easy!
The Direct Method
For:
Chicken . . . with crispy skin
Setup:
Chicken was one of my first cooks, and although the meat was lovely . . . the skin was like a soggy rag . . . not great!. Thankfully after a little trial and error I worked out the setup that works for me. Direct (using long range).
The setup for this couldn’t be easier . . . simply fill an entire chimney full of your chosen fuel, light and wait to come up to heat. Once they’ve turned grey simply chuck in the basket and spread around to cover the entire area.
I use this method every time I cook chicken . . . as I have the ProQ I use two stacks and place the food on the top . . . perfect long range, direct cooking.
One Sided Indirect Method
For:
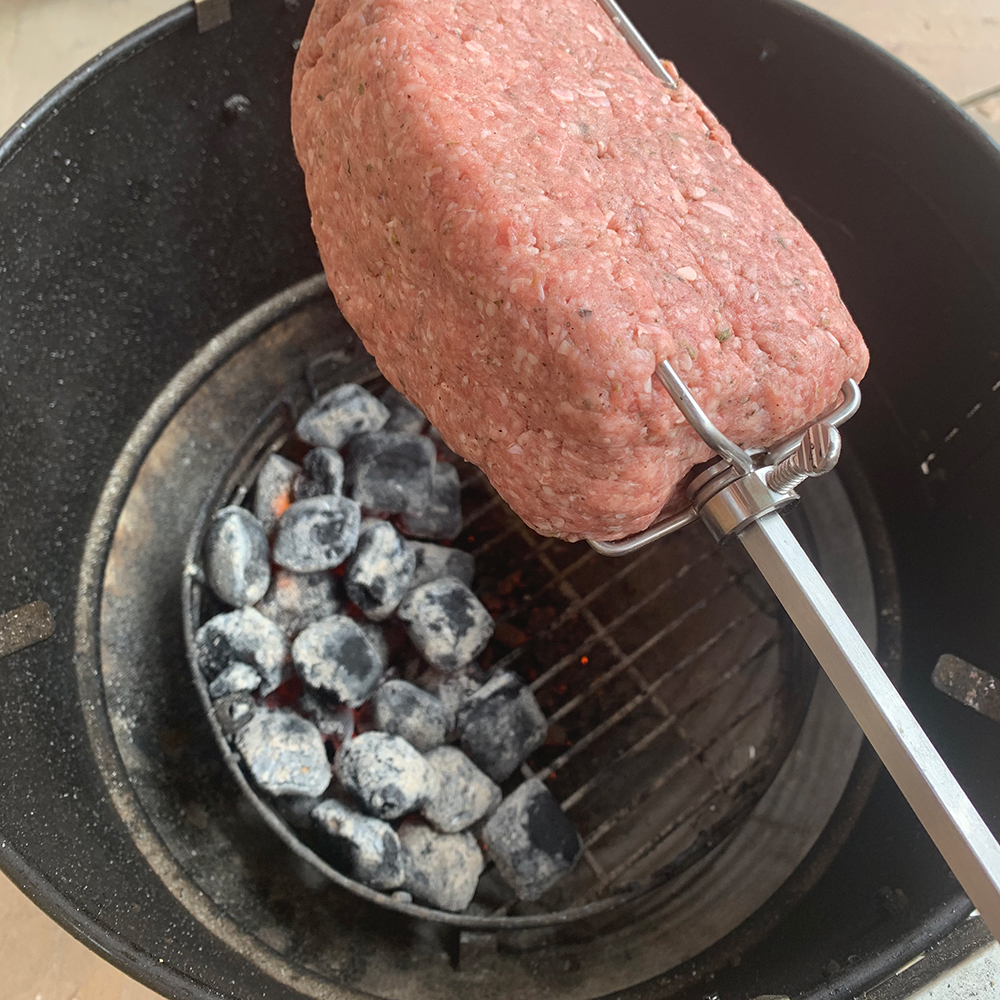
Using rotisserie – Doner Kebabs
Setup:
Oh yes, you heard that correctly . . . Doner Kebabs on the ProQ . . . life changing or what! Anyway . . . this setup is great for the rotisserie, providing a degree of indirect and direct cooking at the same time.
Another easy setup . . . simply fill half an chimney full of your chosen fuel, light and wait to come up to heat. Once they’ve turned grey simply chuck in the basket and push to one side of the basket.
I use this method every time I use the rotisserie and it hasn’t let me down yet.
And there you have it . . . rightly or wrongly so . . . these are the fuel setups I rely on when using the ProQ. I’m sure, over time, i’ll discover more techniques . . . but for now, 4 months in, these are what brings me success time and time again.


