Get ready to sink your teeth into the most perfect pork belly with crackling . . . so golden . . . so crunchy . . . you won’t believe it came out of your own backyard.
This recipe is all about achieving that perfect even crunch on the outside, while keeping the meat juicy and tender on the inside. It’s a labour of love, but trust me . . . it’s well worth the effort.
With a few simple ingredients and some patience, you’ll be able to achieve that perfect crackling every time. So fire up the grill, grab a cold one, and let’s get started!
Oh, one final point worth a mention . . . be sure to check out Pitmaster University on YouTube! It was on David’s channel where I first discovered much of what i’ll be using here.
The Prep
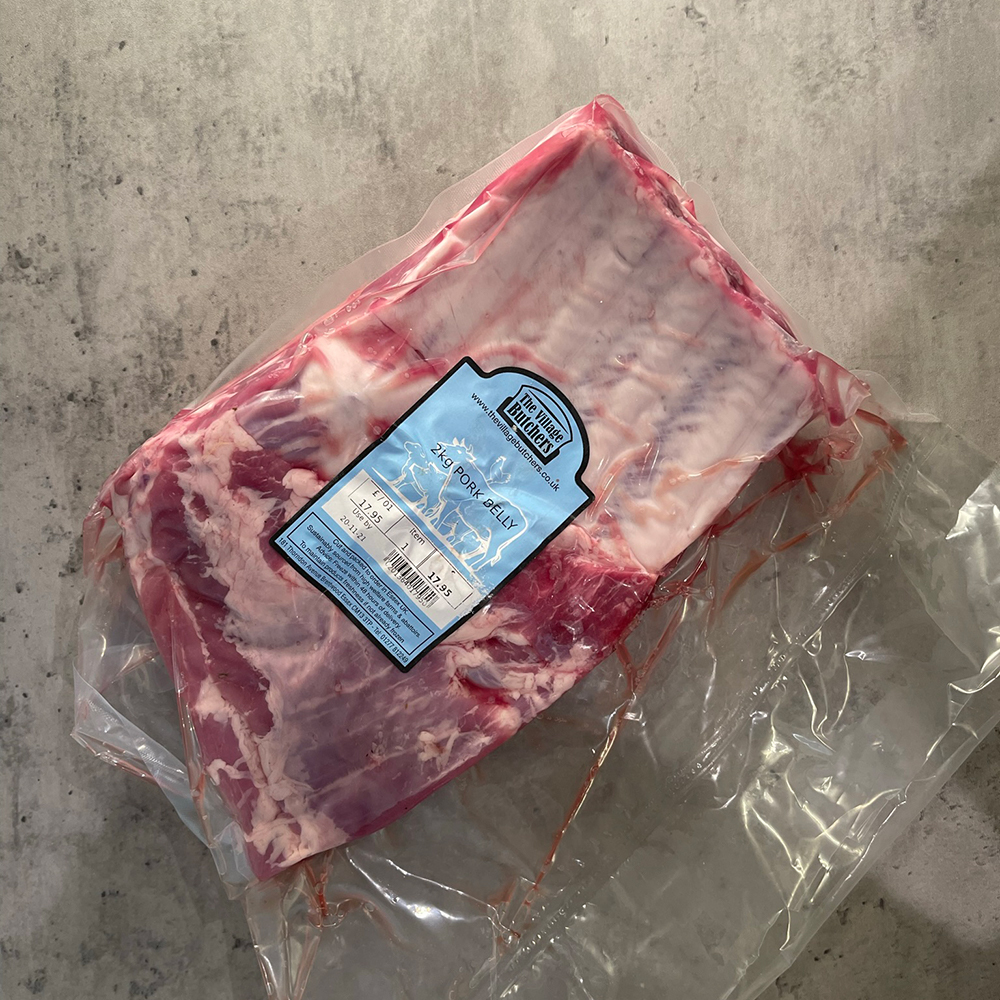
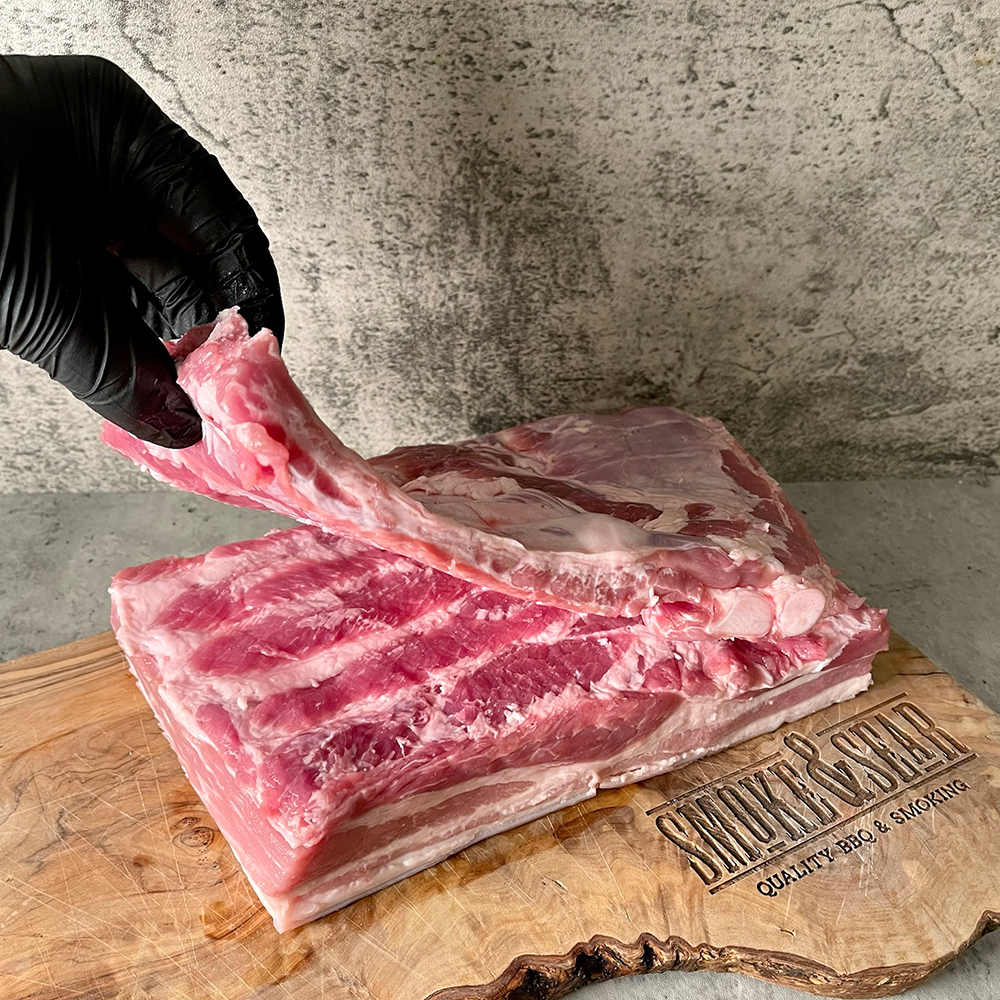
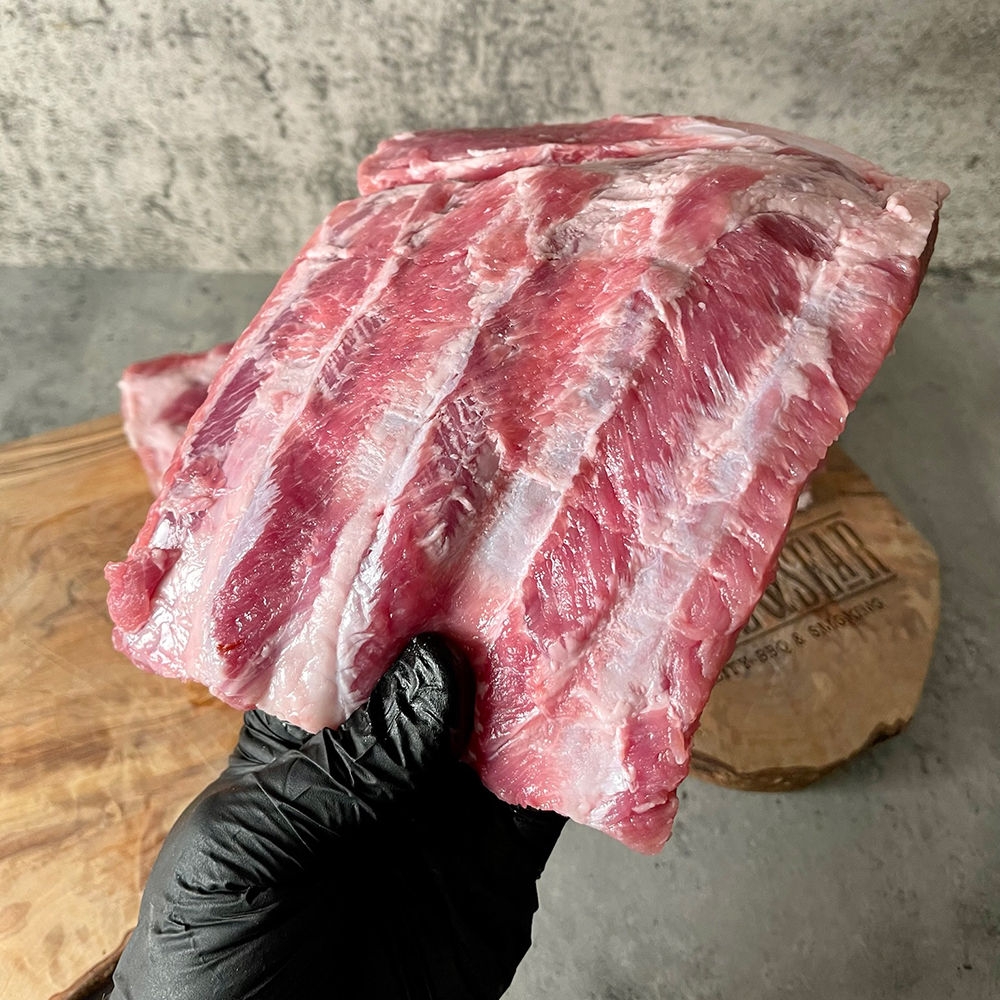
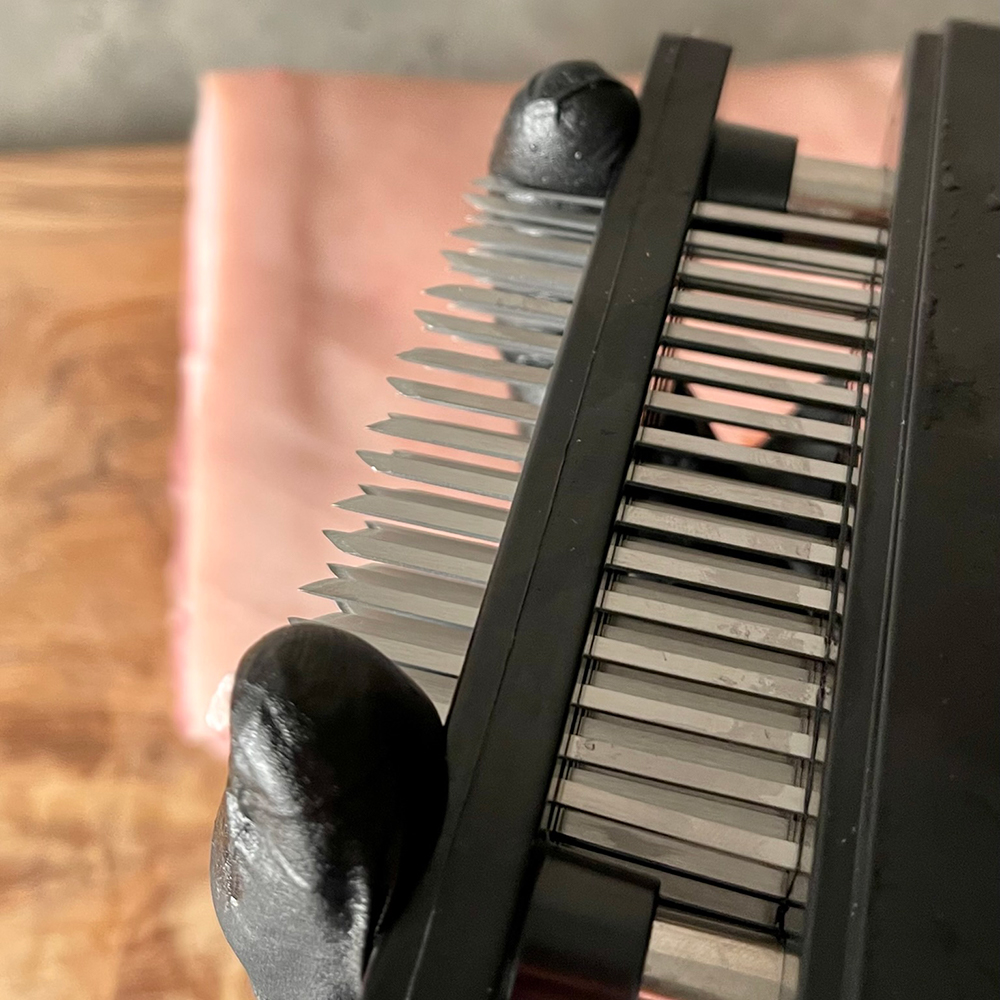
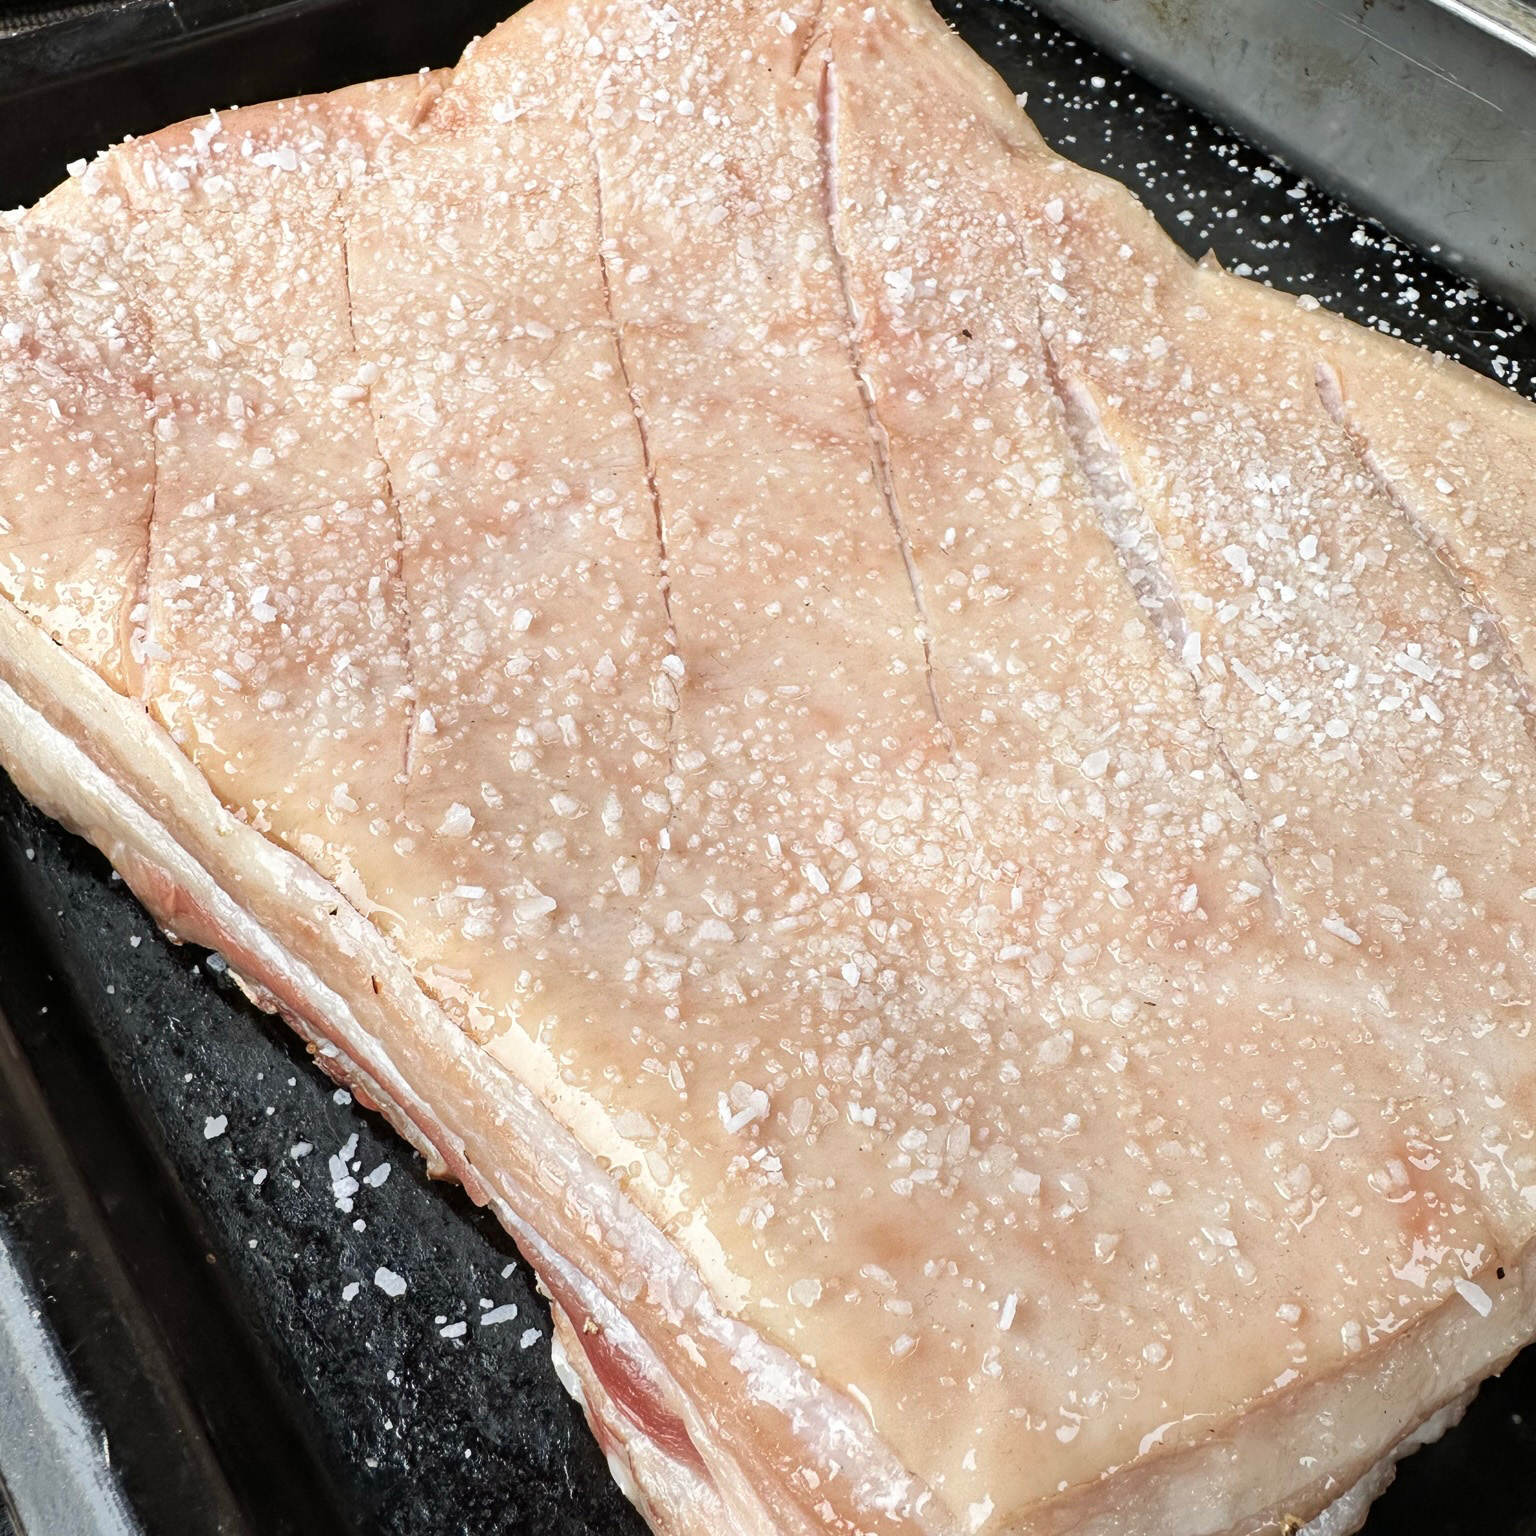
To start, remove the rib bones from the pork belly, making sure to keep the knife as close to the bones as possible to minimize waste.
Once the ribs are removed, pat the skin dry with paper towels before using a meat tenderizer to create tiny holes all over the skin. Be careful not to push the spikes through to the layer of fat underneath.
Next, slice into the meat horizontally at regular intervals, about 2-3cm apart, and make a few shallow vertical cuts. This will help to ensure even cooking and also allows you to get more seasoning into the meat.
Finally, place the pork belly, skin side up and uncovered, in the fridge for 48 hours to dry out the skin, this will help to produce perfect, crispy crackling.
Note: You can season the pork belly before or after refrigerating, depending on your preference . . . just keep ANY seasoning off that skin . . . trust me!


Setting up the KJ
OK, this is a little involved, but it’s worth it!
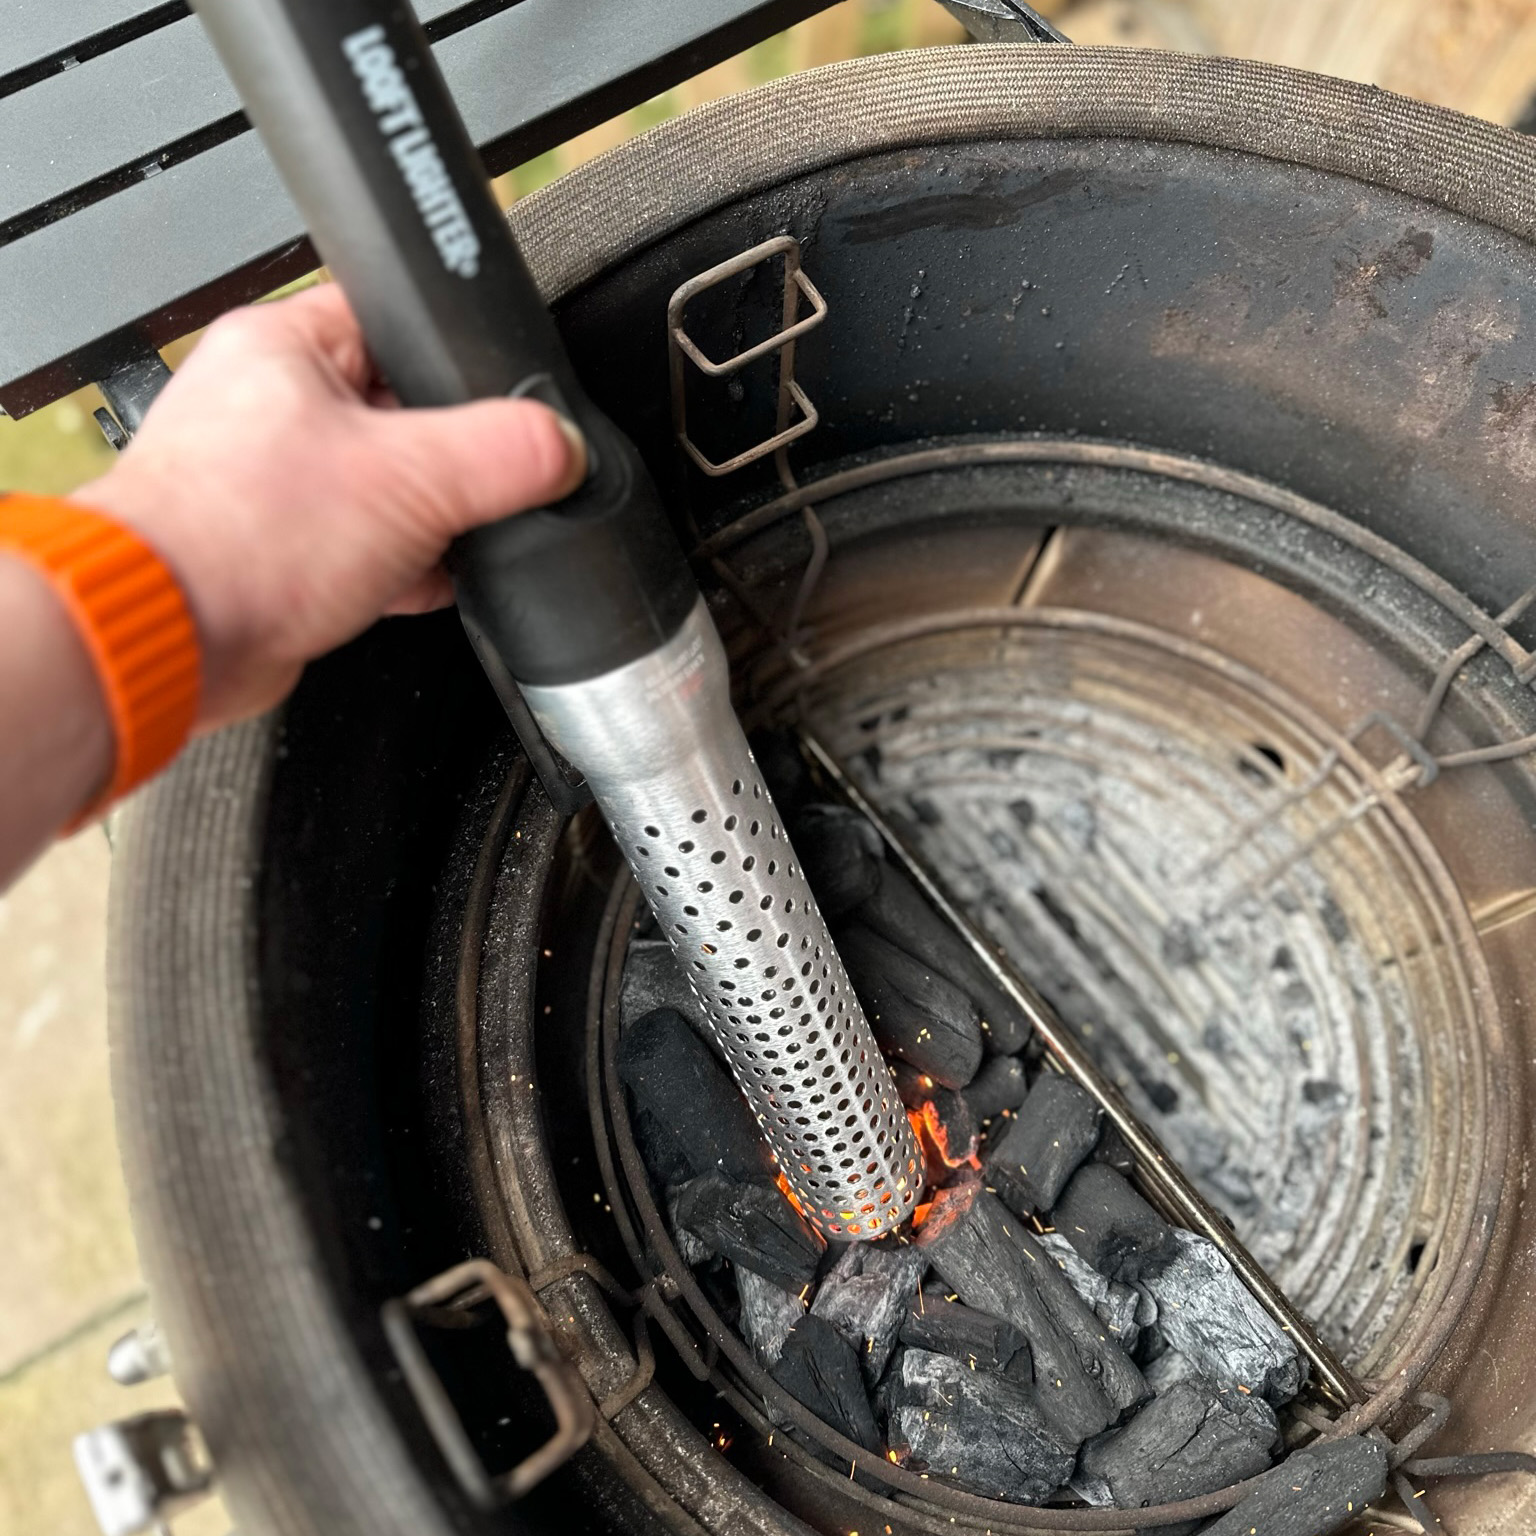
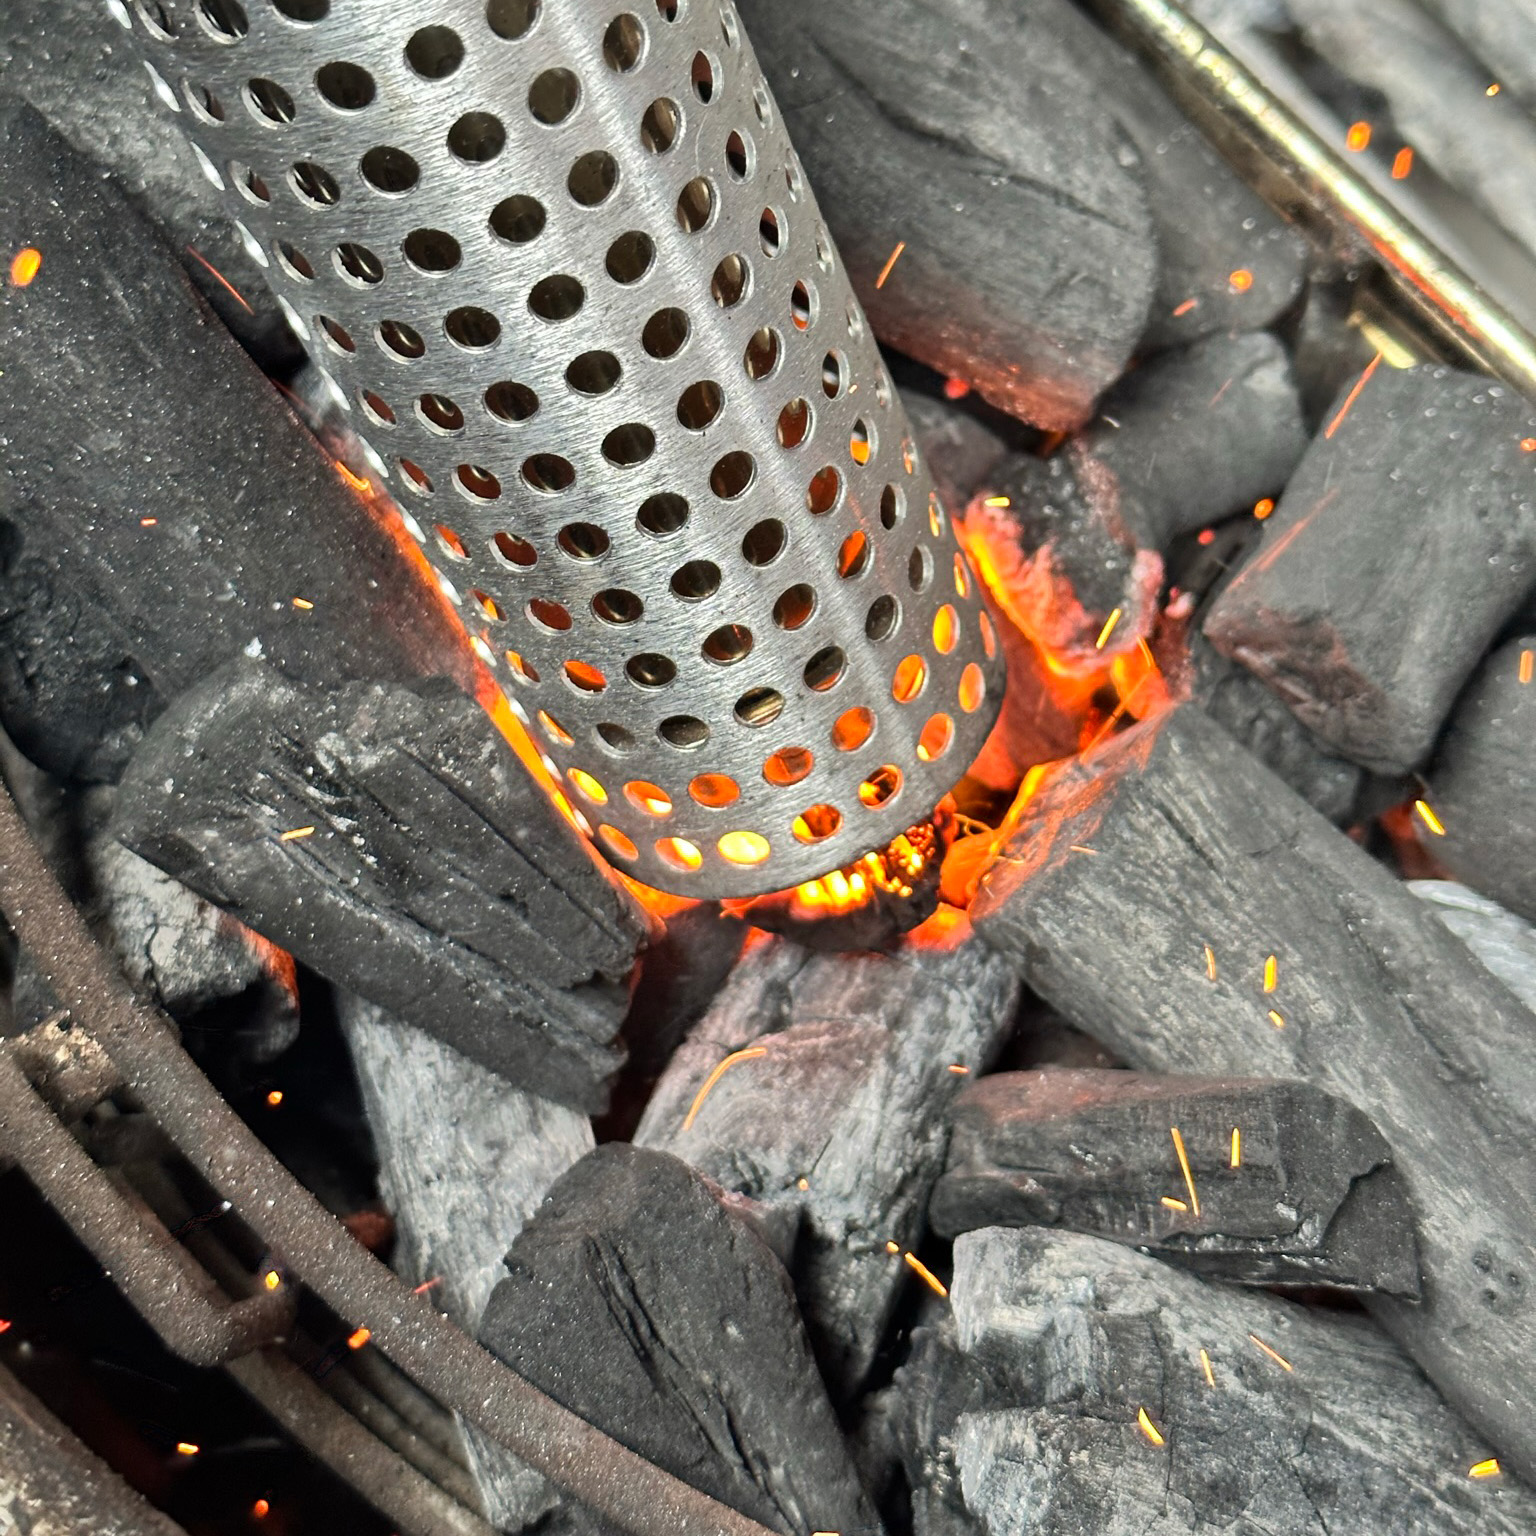
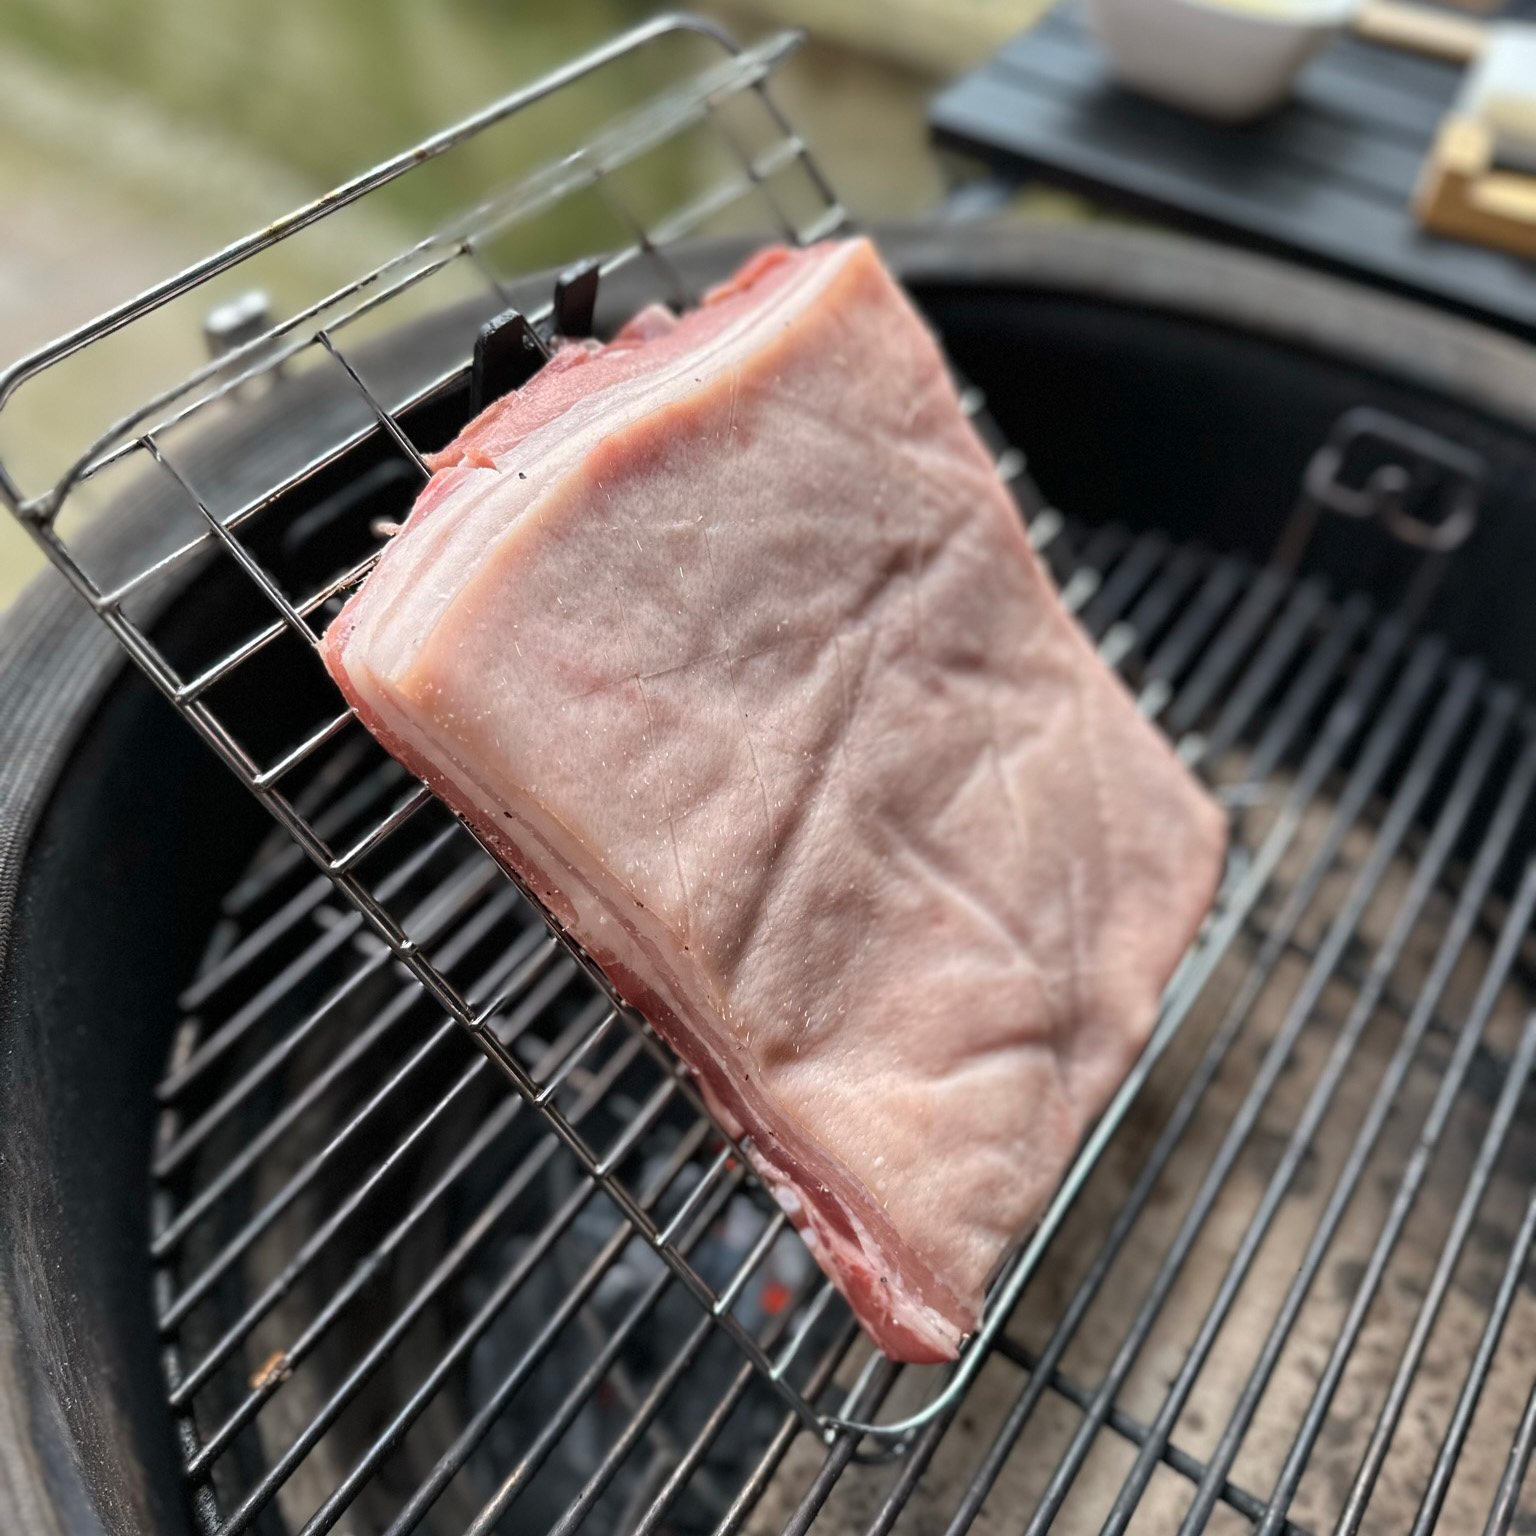
Start by placing the fuel basket divider in your Kamado Joe and filling one side with fuel before igniting it. Next, place a deflector plate over the empty side and add your cooking grates on top.
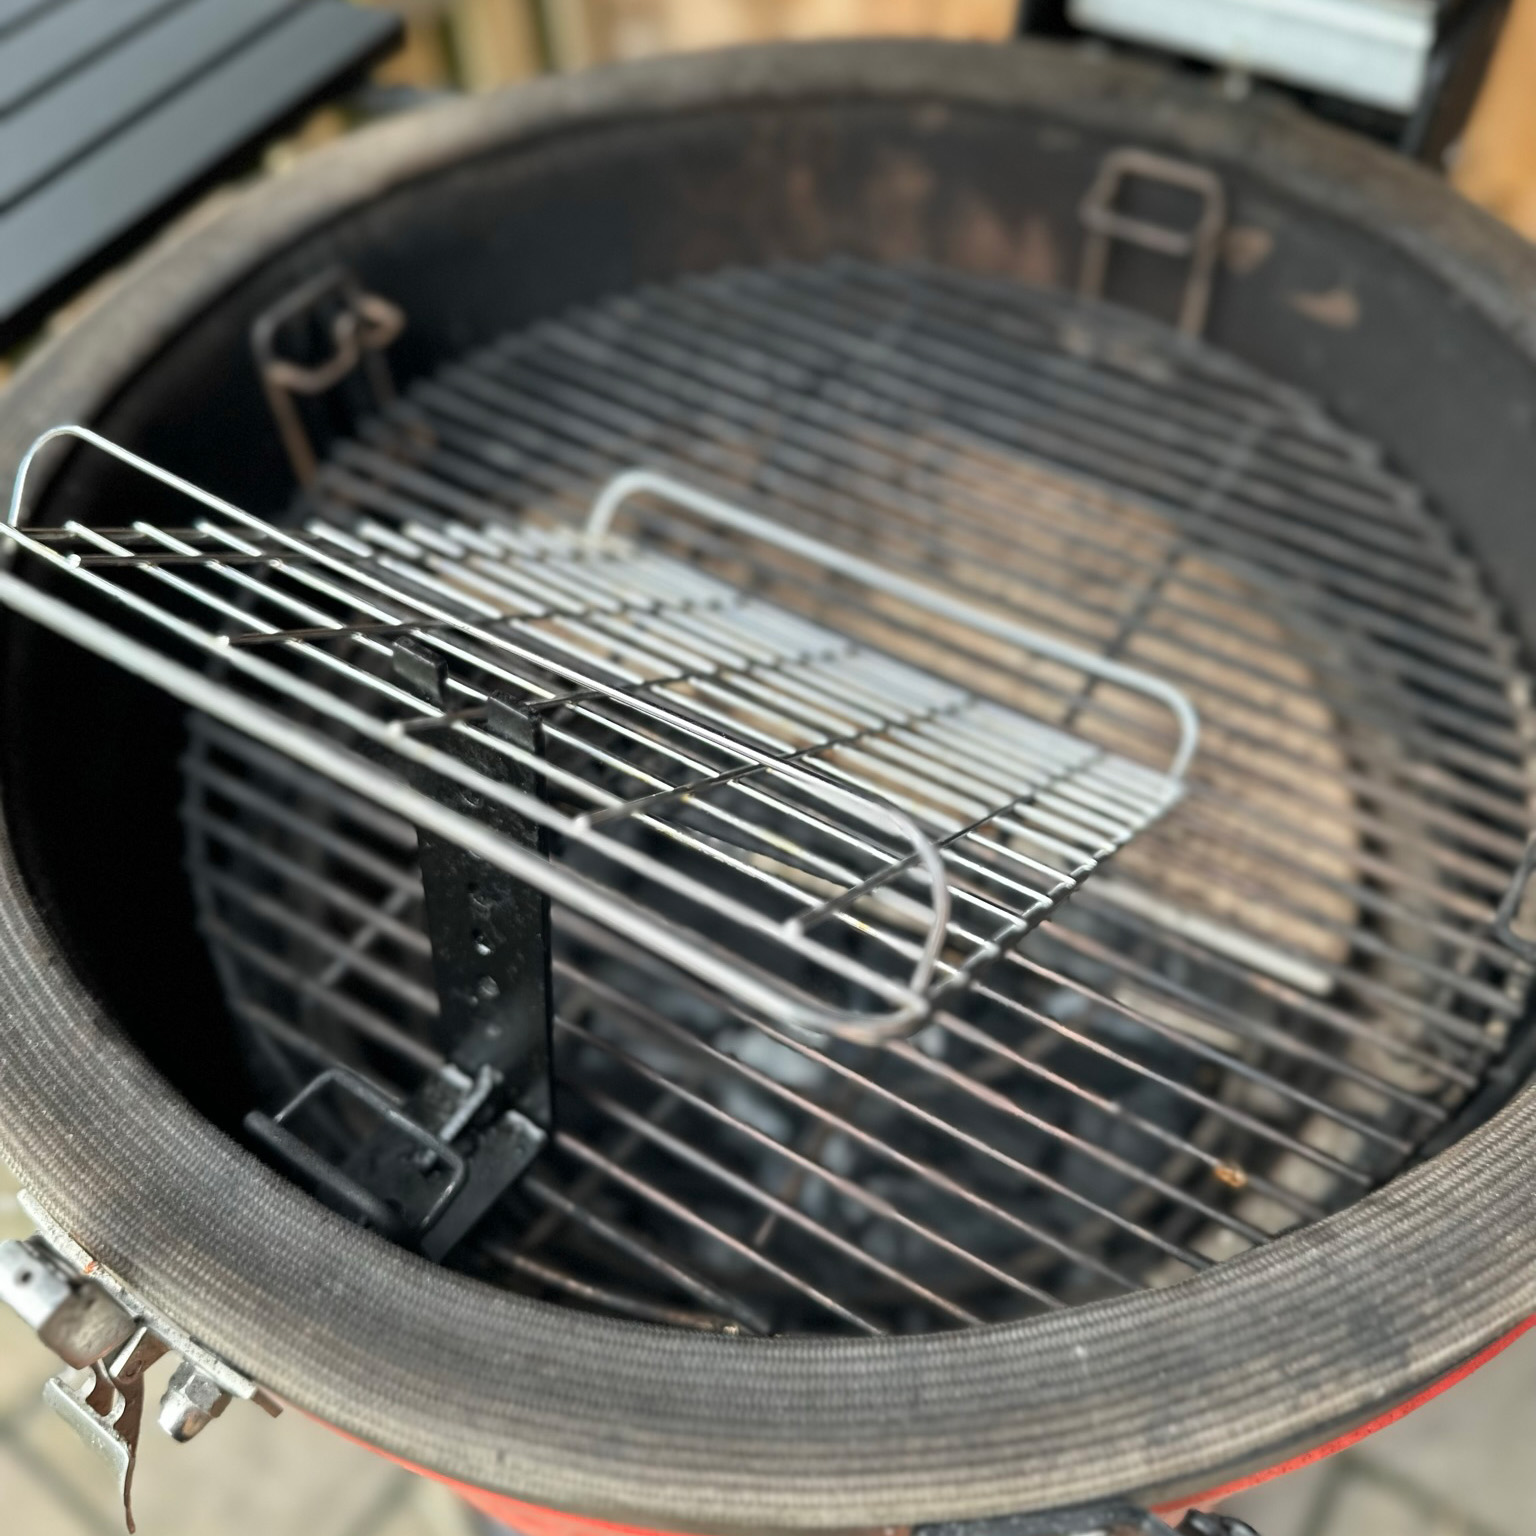
To cook your pork belly perfectly you’ll need to create a support that allows you to lean it directly over the heat source at an angle. We do this for two reasons . . . one . . . it lets the fat / oil run down to one side which reduces flare ups and secondly . . . by not closing the lid fully we can keep an eye on the crackling as it forms.
What did I do? I used a wire rack and the support bracket from my Ozpig rotisserie . . . get creative . . . you’ve go this!
Note: Make sure your support can handle the weight of your pork belly.
Once you’re happy close the lid down for now and get the KJ running at 250°c.
First the Crackling
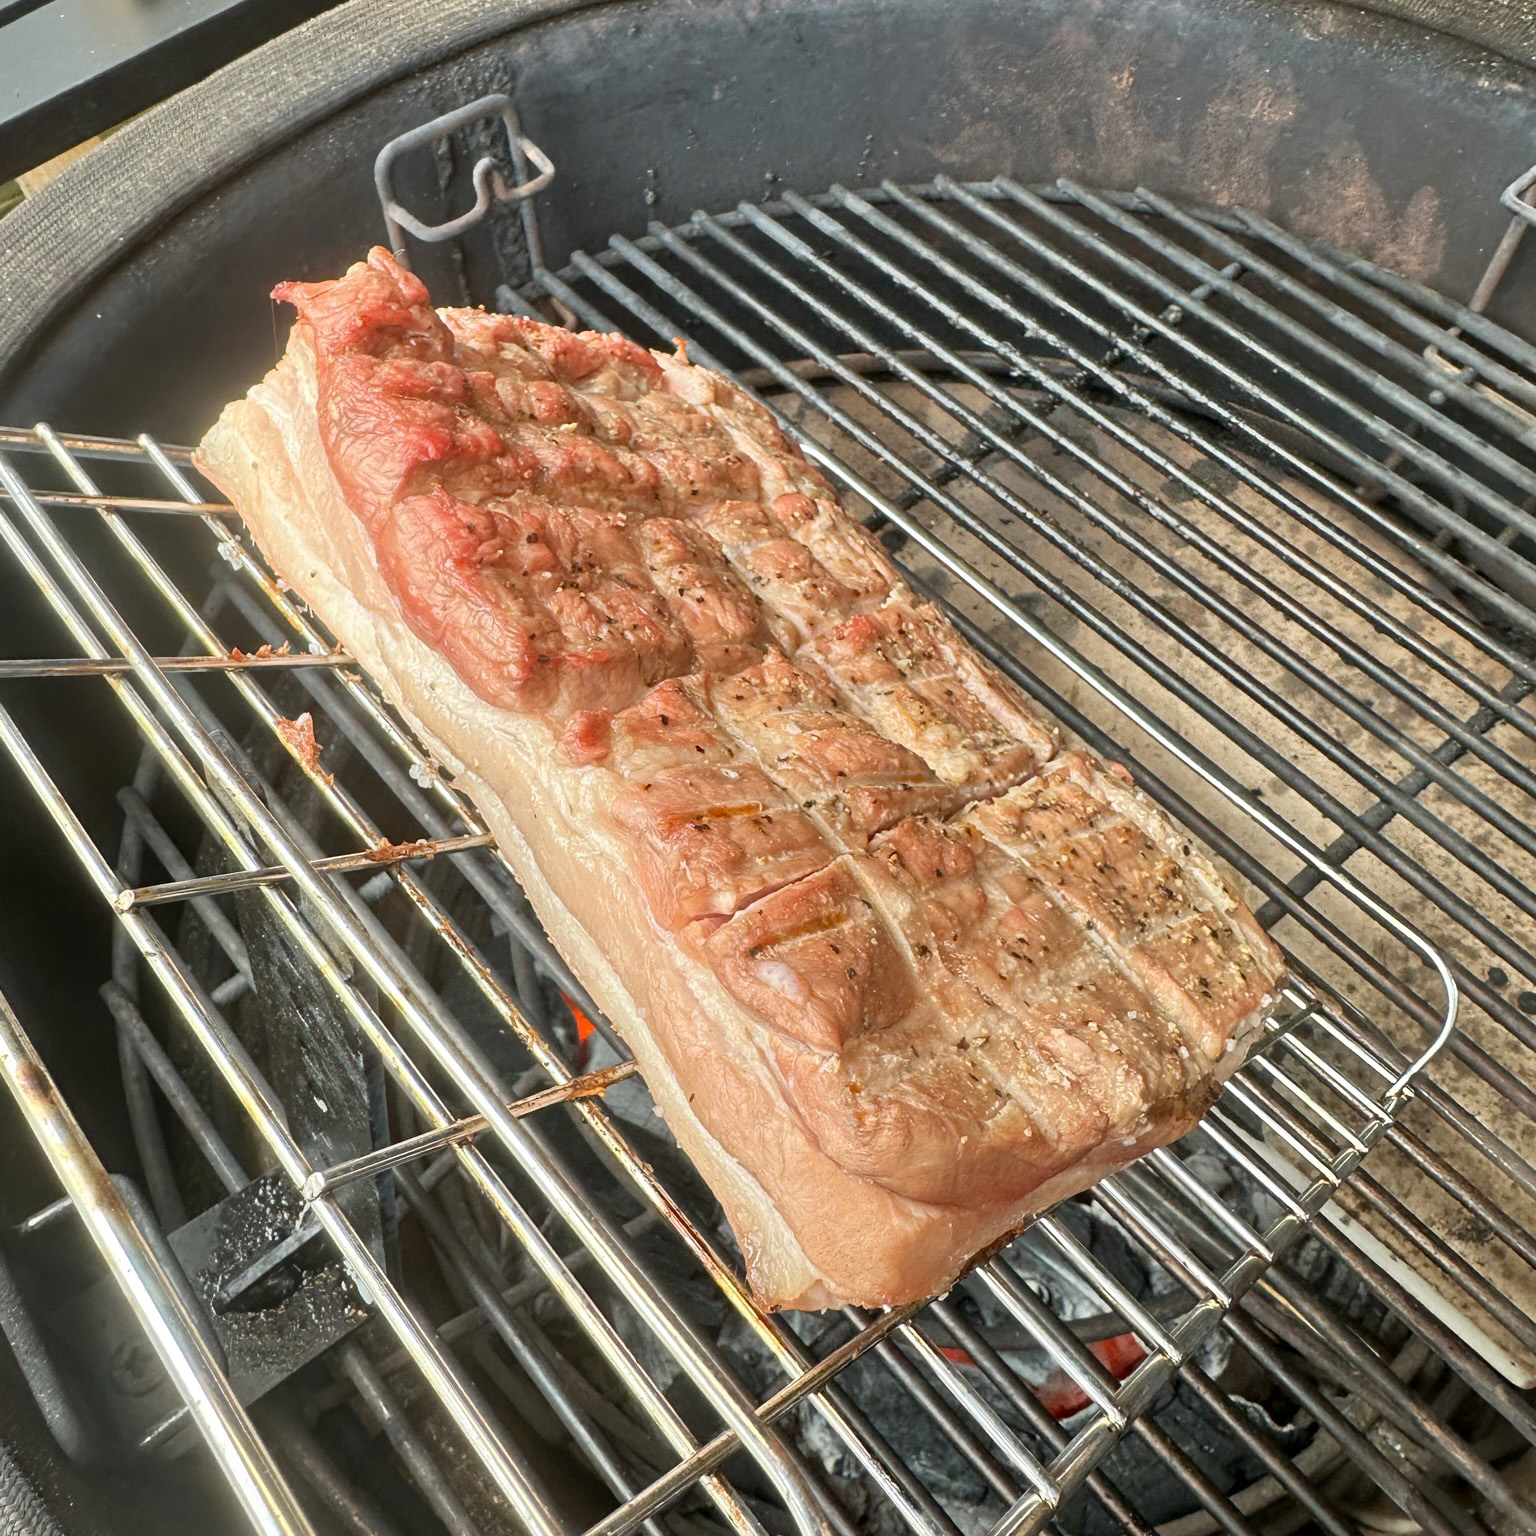
To begin, place your pork belly meat side down on the support and close the lid fully. Let it sit like this for just 10 minutes. This extra step ensures that the skin is as dry as possible . . . which is crucial for getting that perfect crackling.
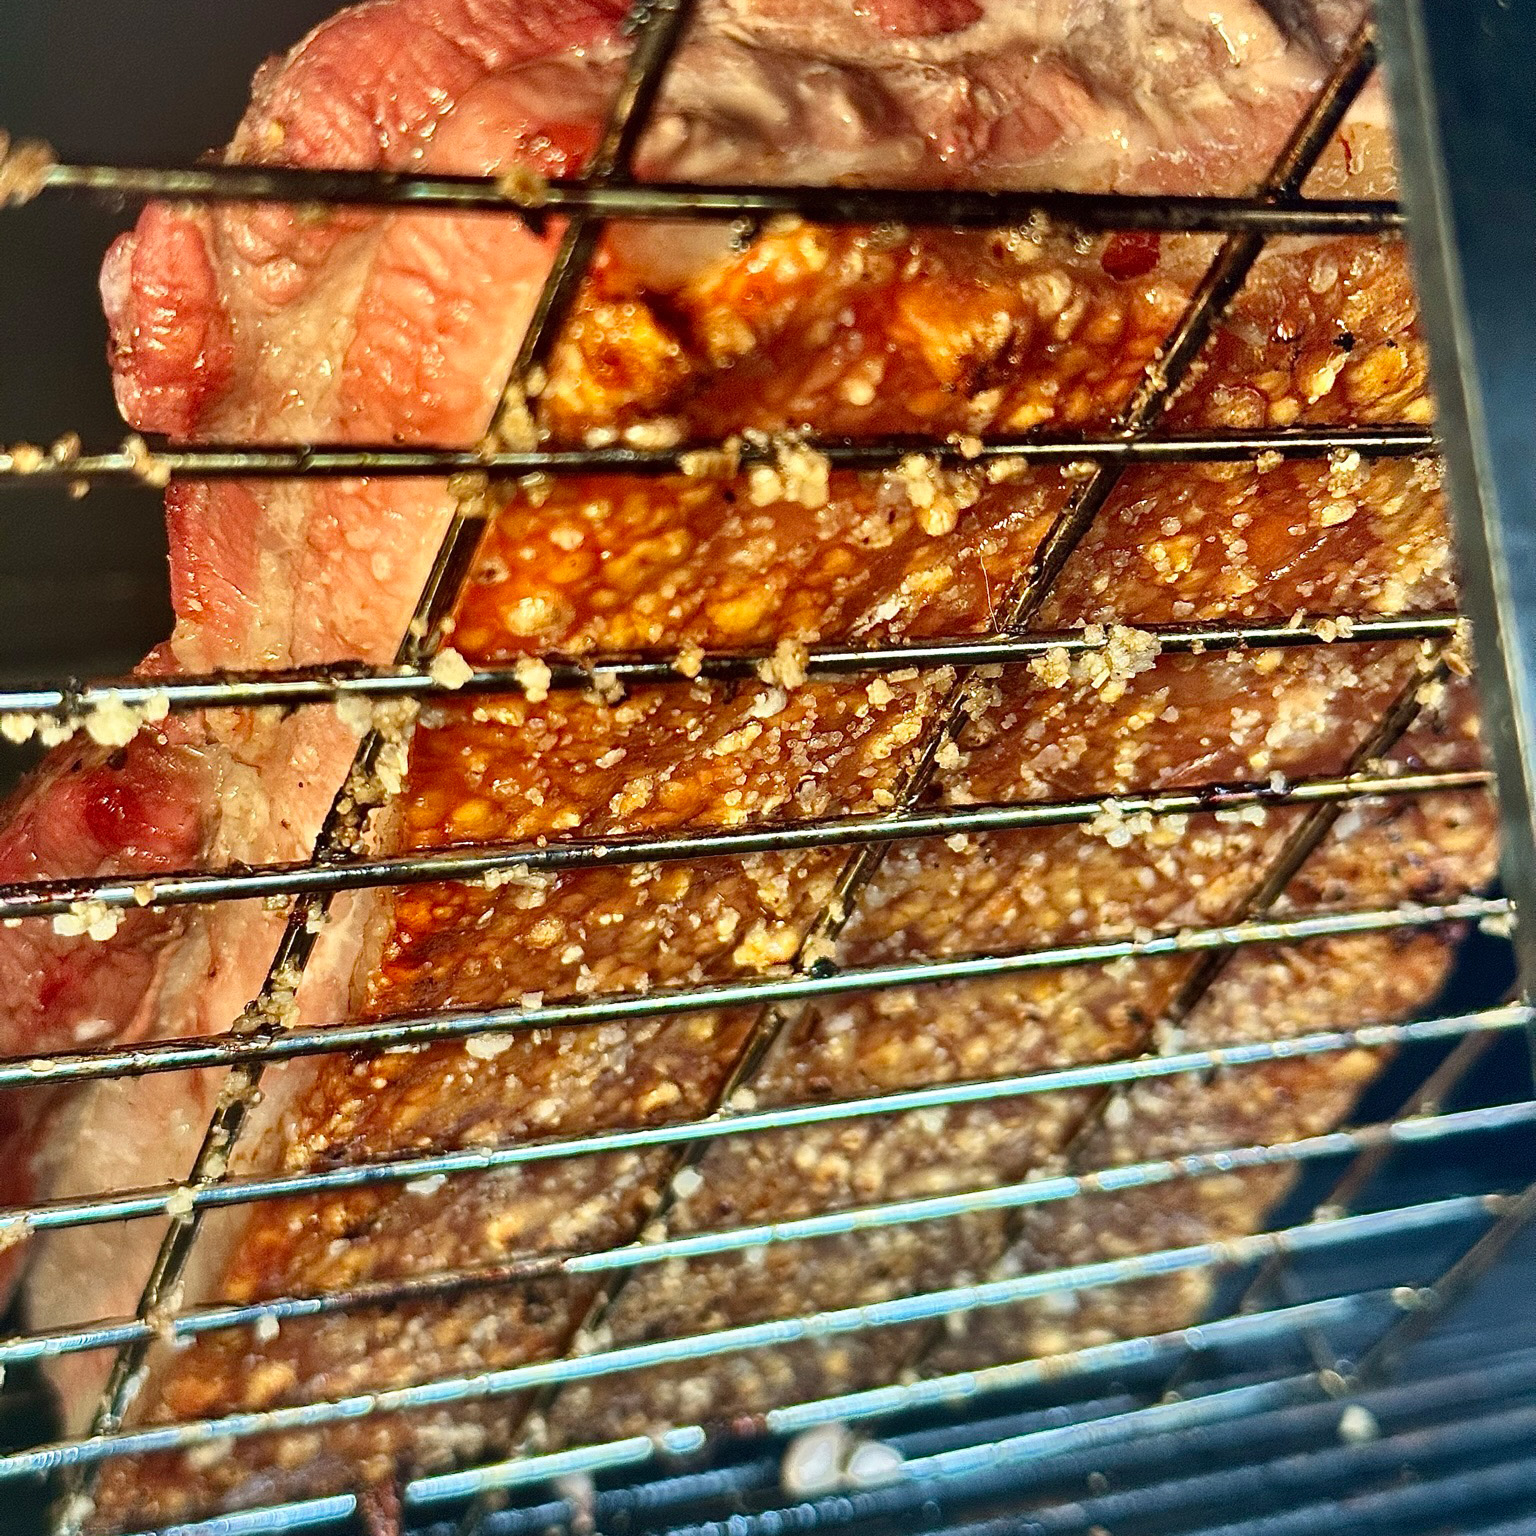
After 10 minutes, brush olive oil over the skin and sprinkle with high-quality salt. When you’re happy with the seasoning, flip the belly over so that the skin is directly over the fuel. Close the lid partially, leaving a 2cm gap to keep an eye on the crackling formation.
Open the lid periodically and rotate the pork belly as needed to prevent any areas from burning and to achieve a uniform crackling.


Getting up to Temp
First, grab yourself a beer . . . you’ve earned it!
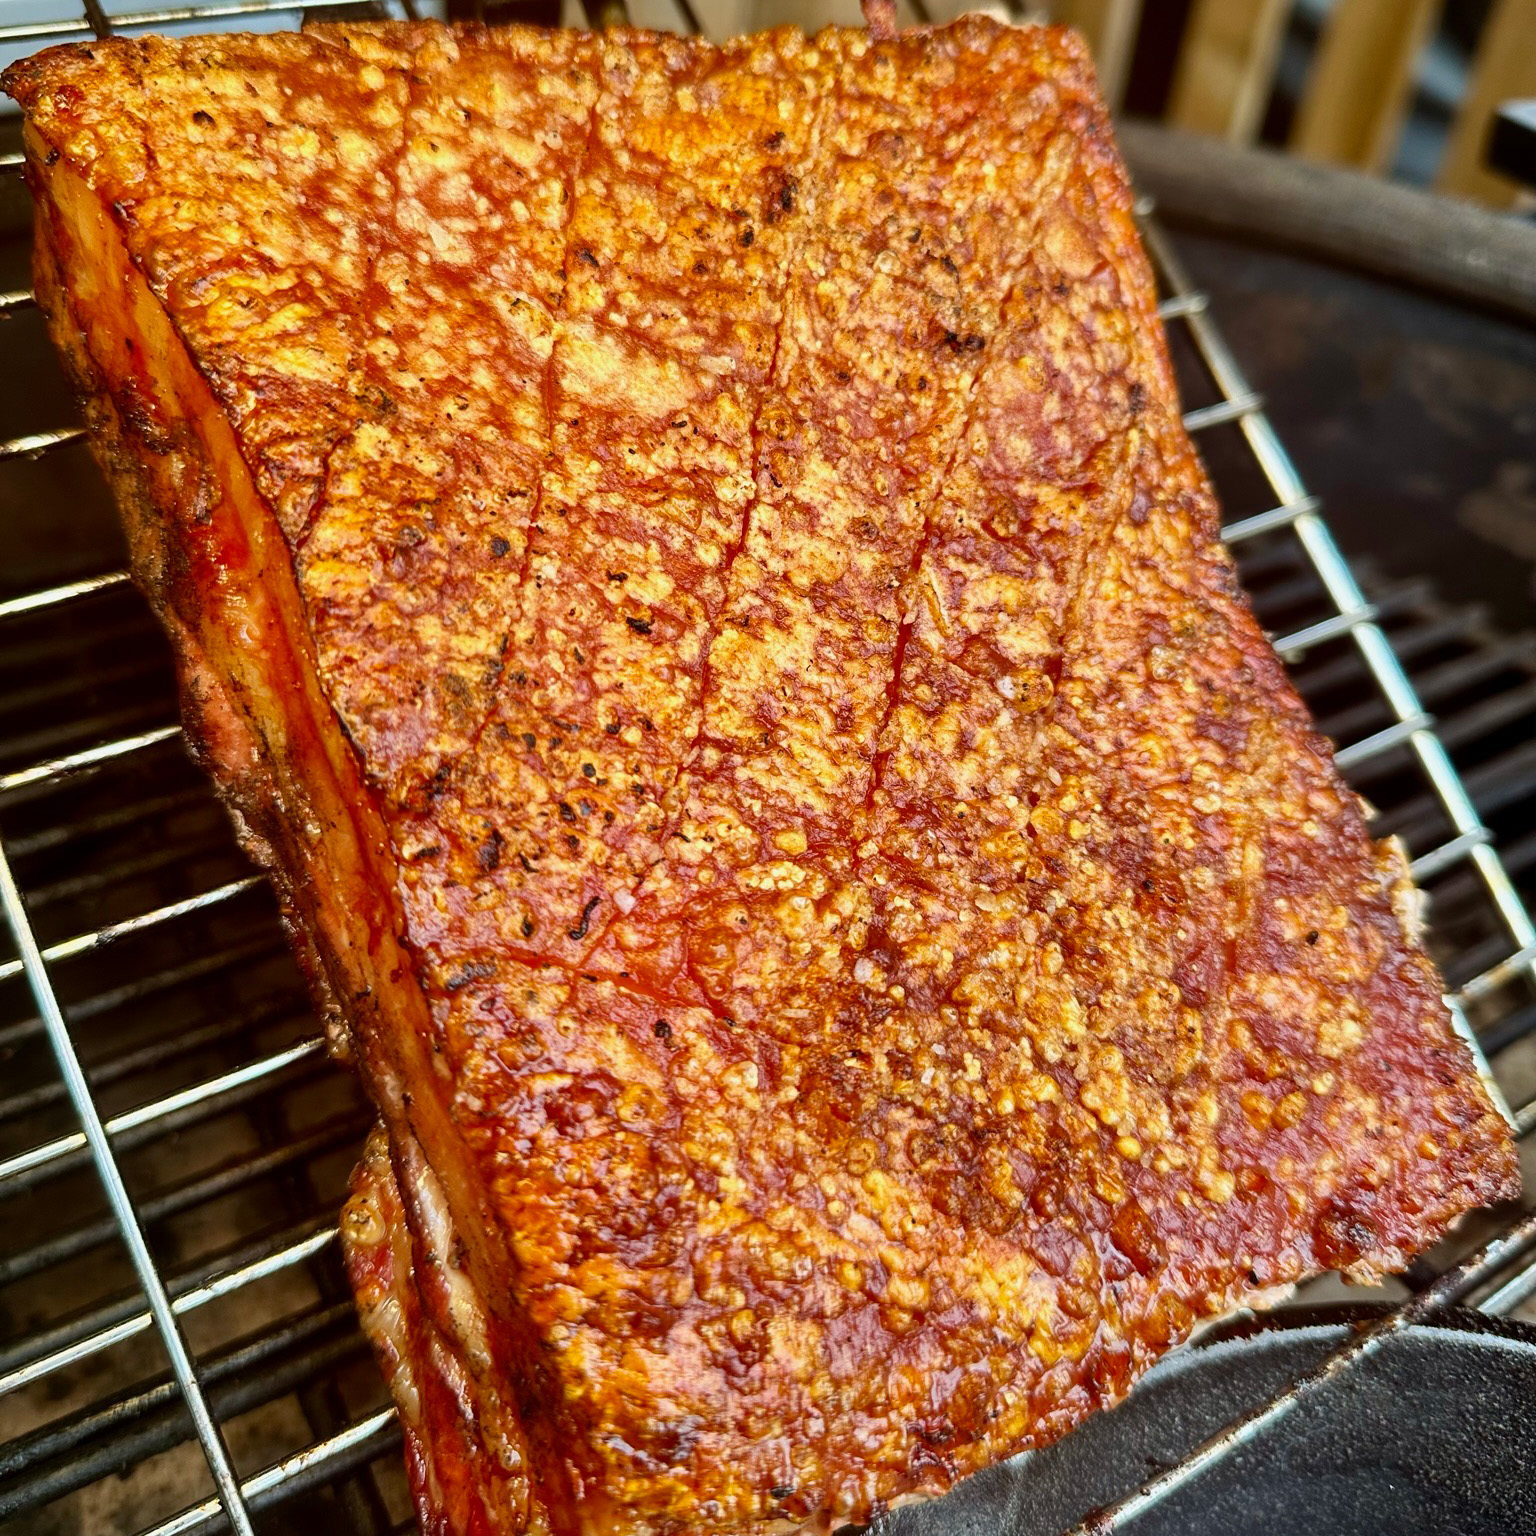
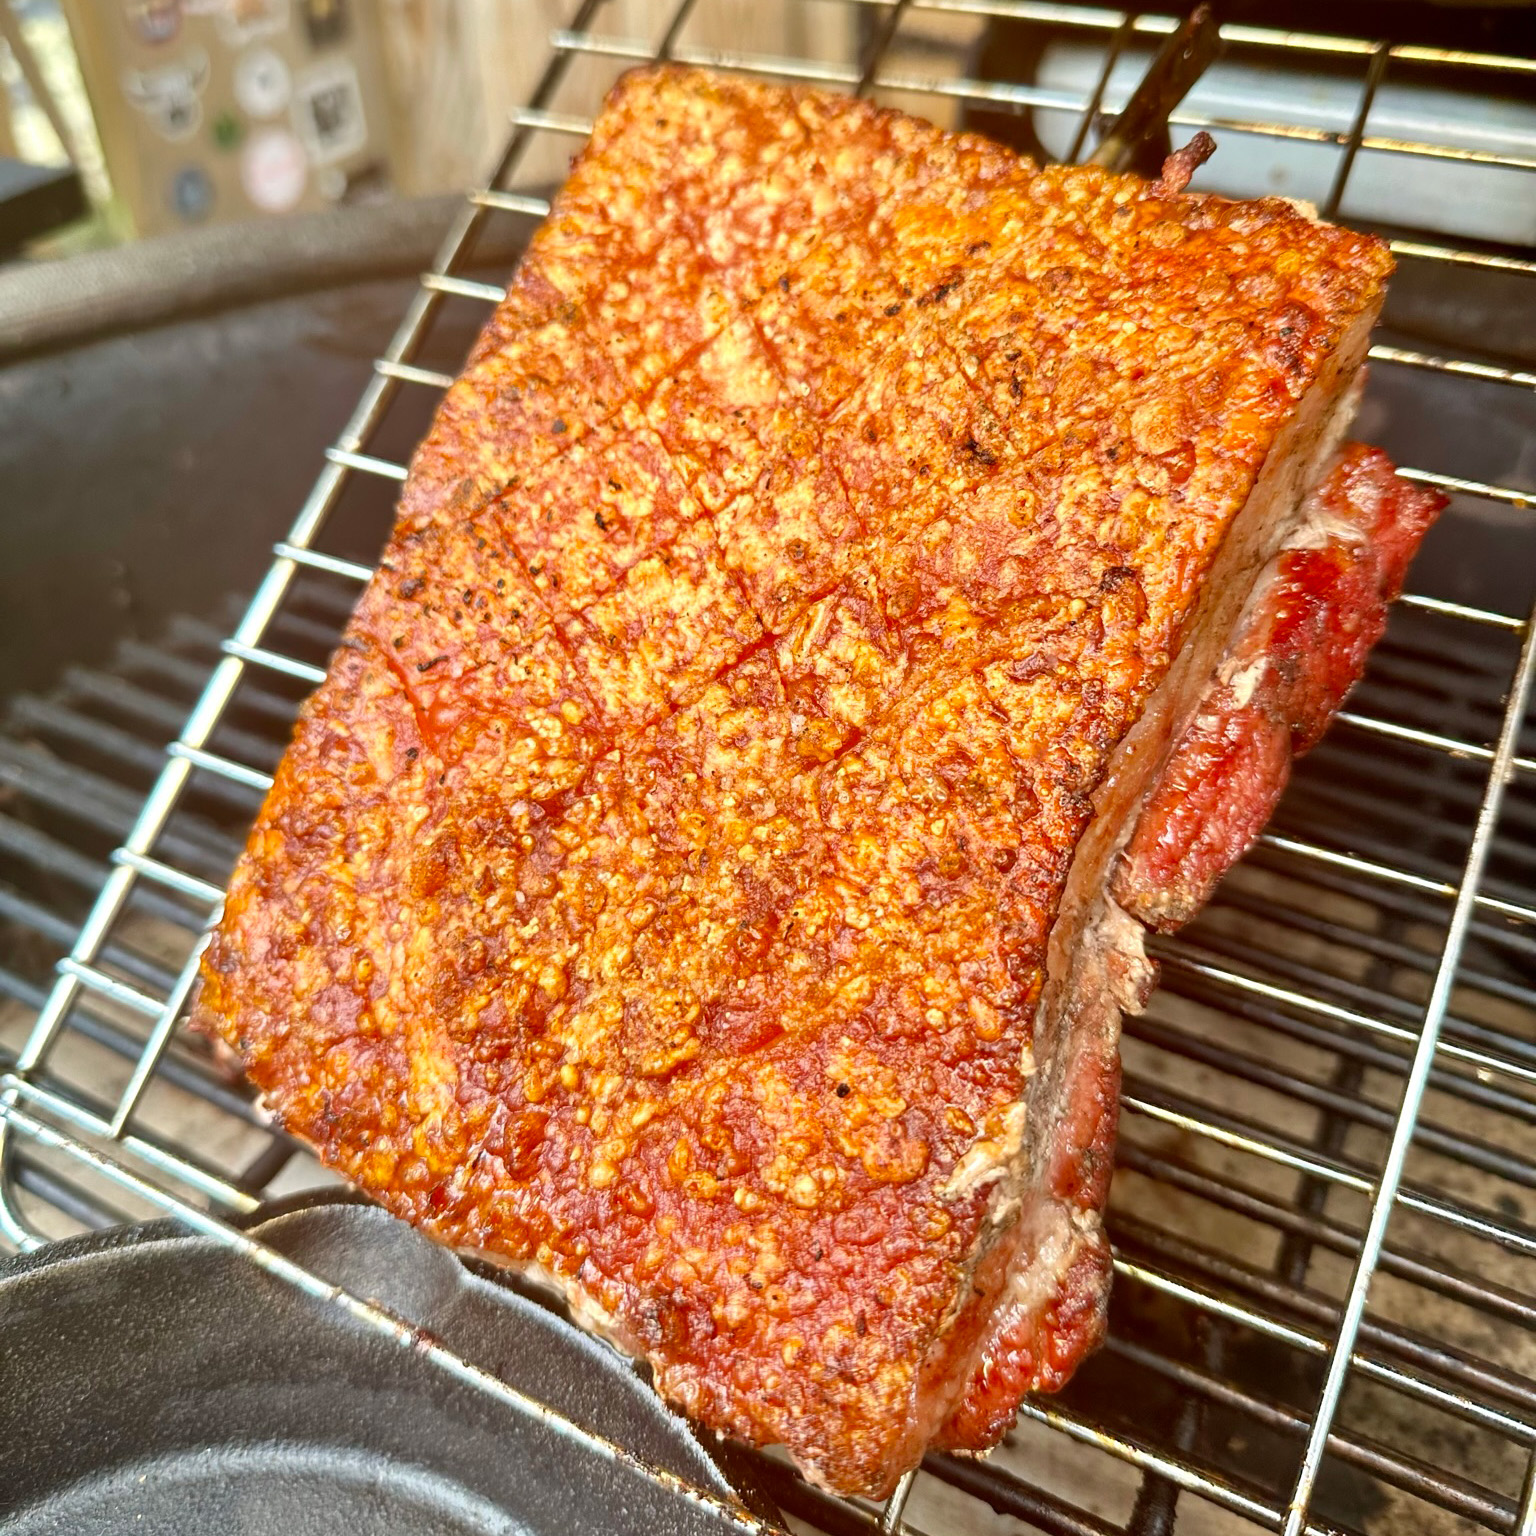
By now you should have your perfect crackling and all we need to do now is continue with the cook until the internal temperature is 85°c.
Take the pork belly off the BBQ briefly to reposition the support over the deflector plate, creating an indirect cook. Place the pork belly back on the KJ, crackling side up, and continue cooking until the internal temperature reaches 85°C, which won’t take long.
Rest and Slice
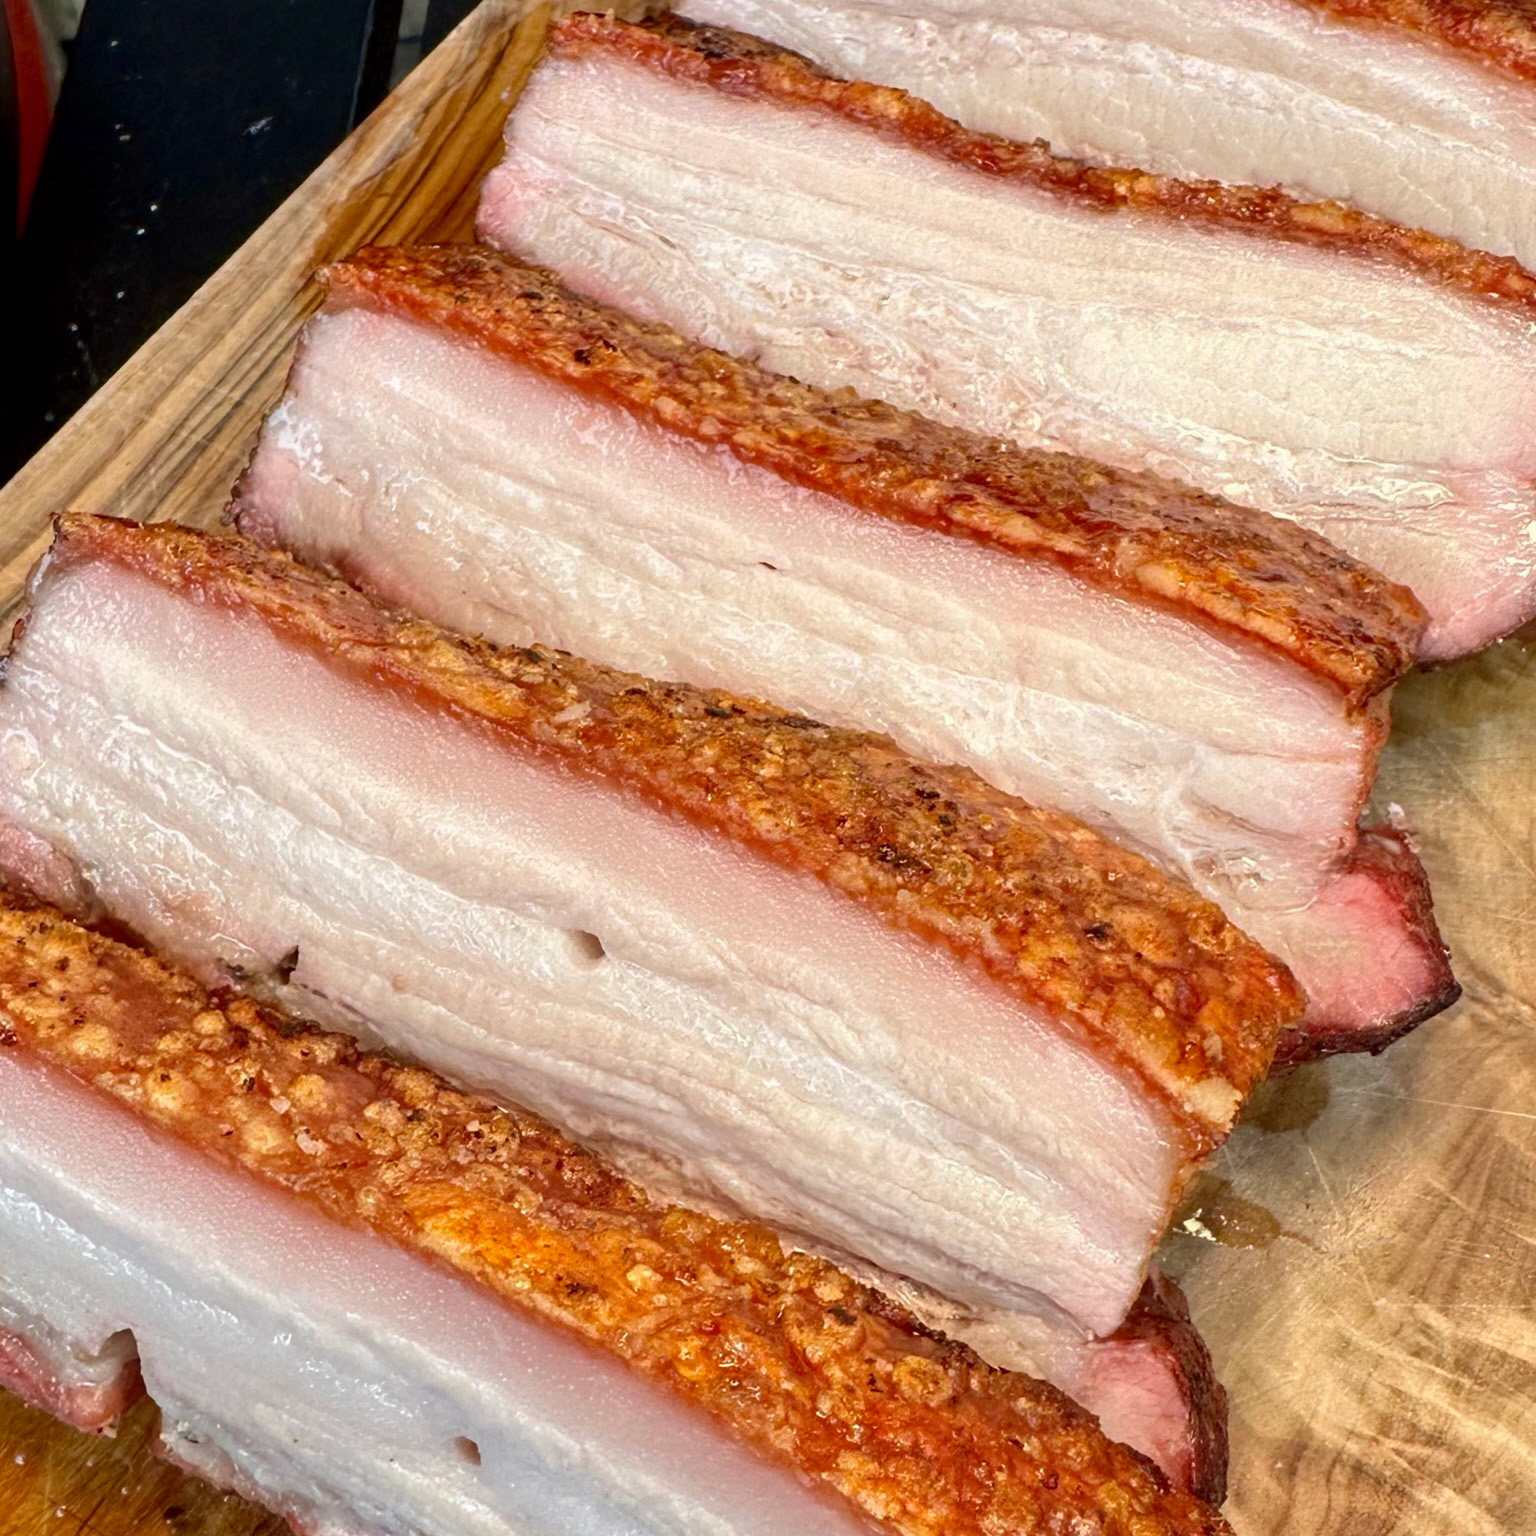
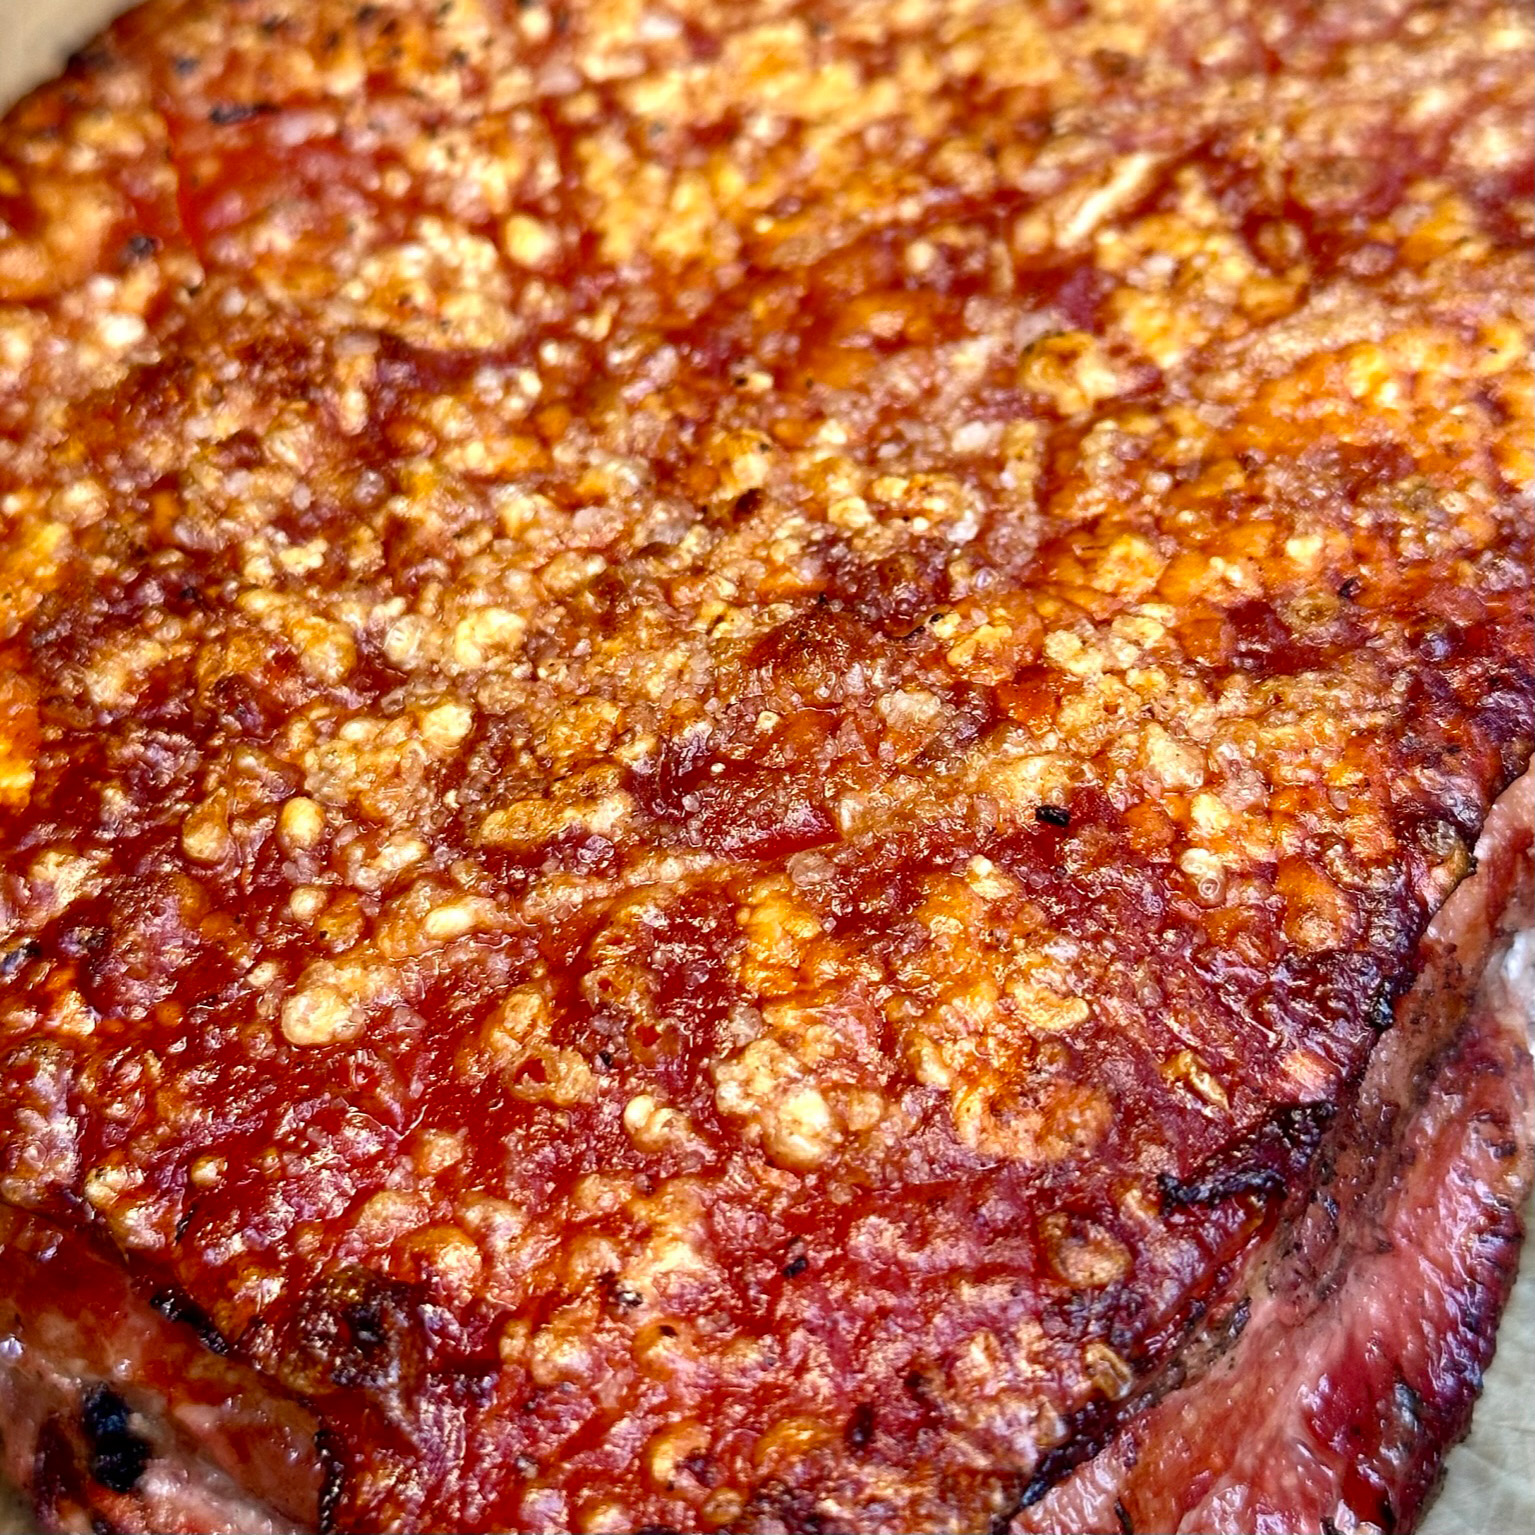
Once you’ve let your pork rest for 10-15 minutes and filmed yourself dragging a knife over the crackling a few times . . . it’s the moment to slice into that belly and see what you’ve got!
Flip the pork belly over and use a large sharp knife to make the cuts. Slicing this way will be easier and keep the crackling intact as much as possible.
. . . and there we have it . . . perfection!

The Final Result
Cheers @pitmasteruniversity