Halloumi & Cherry Tomato Focaccia

Halloumi & Cherry Tomato Focaccia

Servings: 10 Total Time: 5 hrs 5 mins Difficulty: Intermediate Family Friendly Family Friendly
Golden focaccia packed with squeaky halloumi and juicy cherry tomatoes – baked like a boss in your Ninja Woodfire Oven.

Right, if you’ve never had a warm slice of homemade focaccia straight off the BBQ, buckle up – this one’s a game changer. We’re talking fluffy inside, golden crust, and that rich hit of olive oil, tomatoes and squeaky halloumi cheese to top it all off. This recipe uses the Ninja Woodfire Oven to full effect, with a two-stage baking method that gives you the best of both worlds – crispy topping, properly baked centre. If you’ve ever struggled with burnt tops and soggy bottoms (we’ve all been there), the deflector plate trick sorts that right out. Perfect for a weekend bake or a side dish to soak up the juices from your latest smoked meat creation. Let’s get stuck in, yeah?

Halloumi & Cherry Tomato Focaccia

Prep Time 4 hrs Cook Time 35 mins Rest Time 30 mins Total Time 5 hrs 5 mins
Difficulty: Intermediate Cooking Temp: 230  C Servings: 10 Estimated Cost: £ 8 Calories: Approximately 280 per serving Best Season: Summer

Ingredients

For the Focaccia Dough:

For the Toppings:

Instructions

  1. Mix the Dry Ingredients:

    In a large mixing bowl, chuck in your strong white bread flour and dry active yeast. Give it a little stir to combine.

  2. Add the Wet Stuff:

    Make a well in the middle of the flour mix, then pour in the warm water, honey, salt, and olive oil. Mix it all together with a spoon (or your hands if you're brave) until it becomes a proper wet and sticky dough.
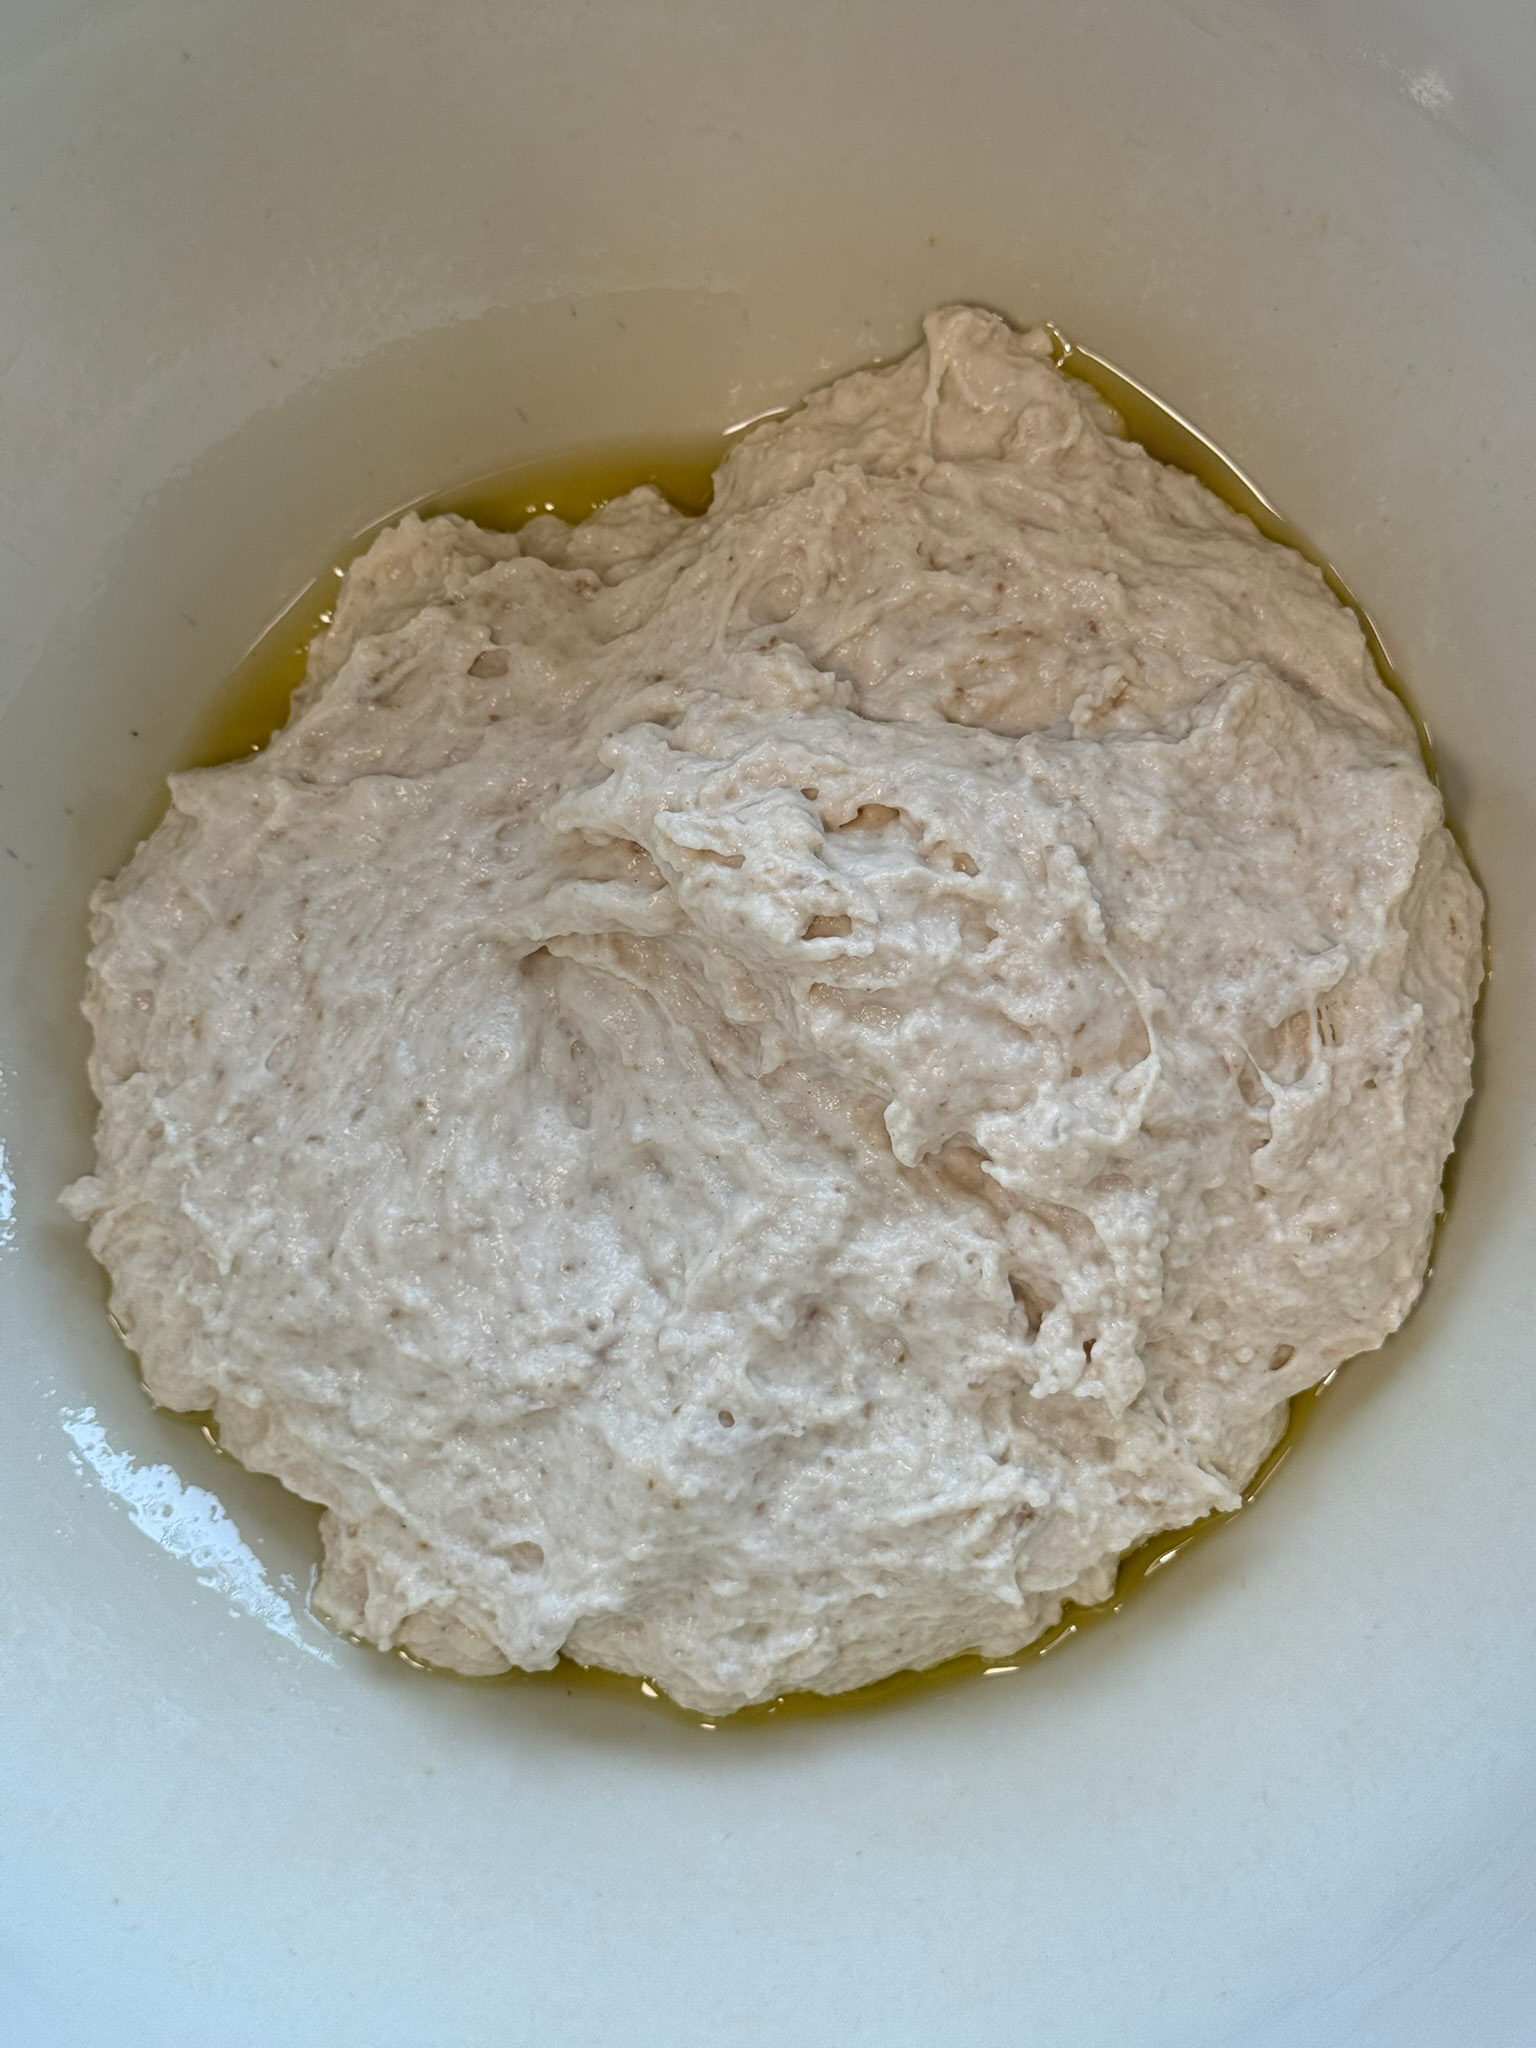
  3. Fold & Rest – Three Times:

    Oil another bowl lightly, tip in your dough, and give it 5 quick folds. Cover with a damp towel and let it rest for 20 minutes. Repeat this process two more times – fold, rest, fold, rest – for a total of three folds.

  4. Let It Rise:

    Now cling film that bowl and let it sit somewhere warm until it doubles in size. You can do this at room temp over a few hours, or slow-proof it overnight in the fridge for even better flavour.
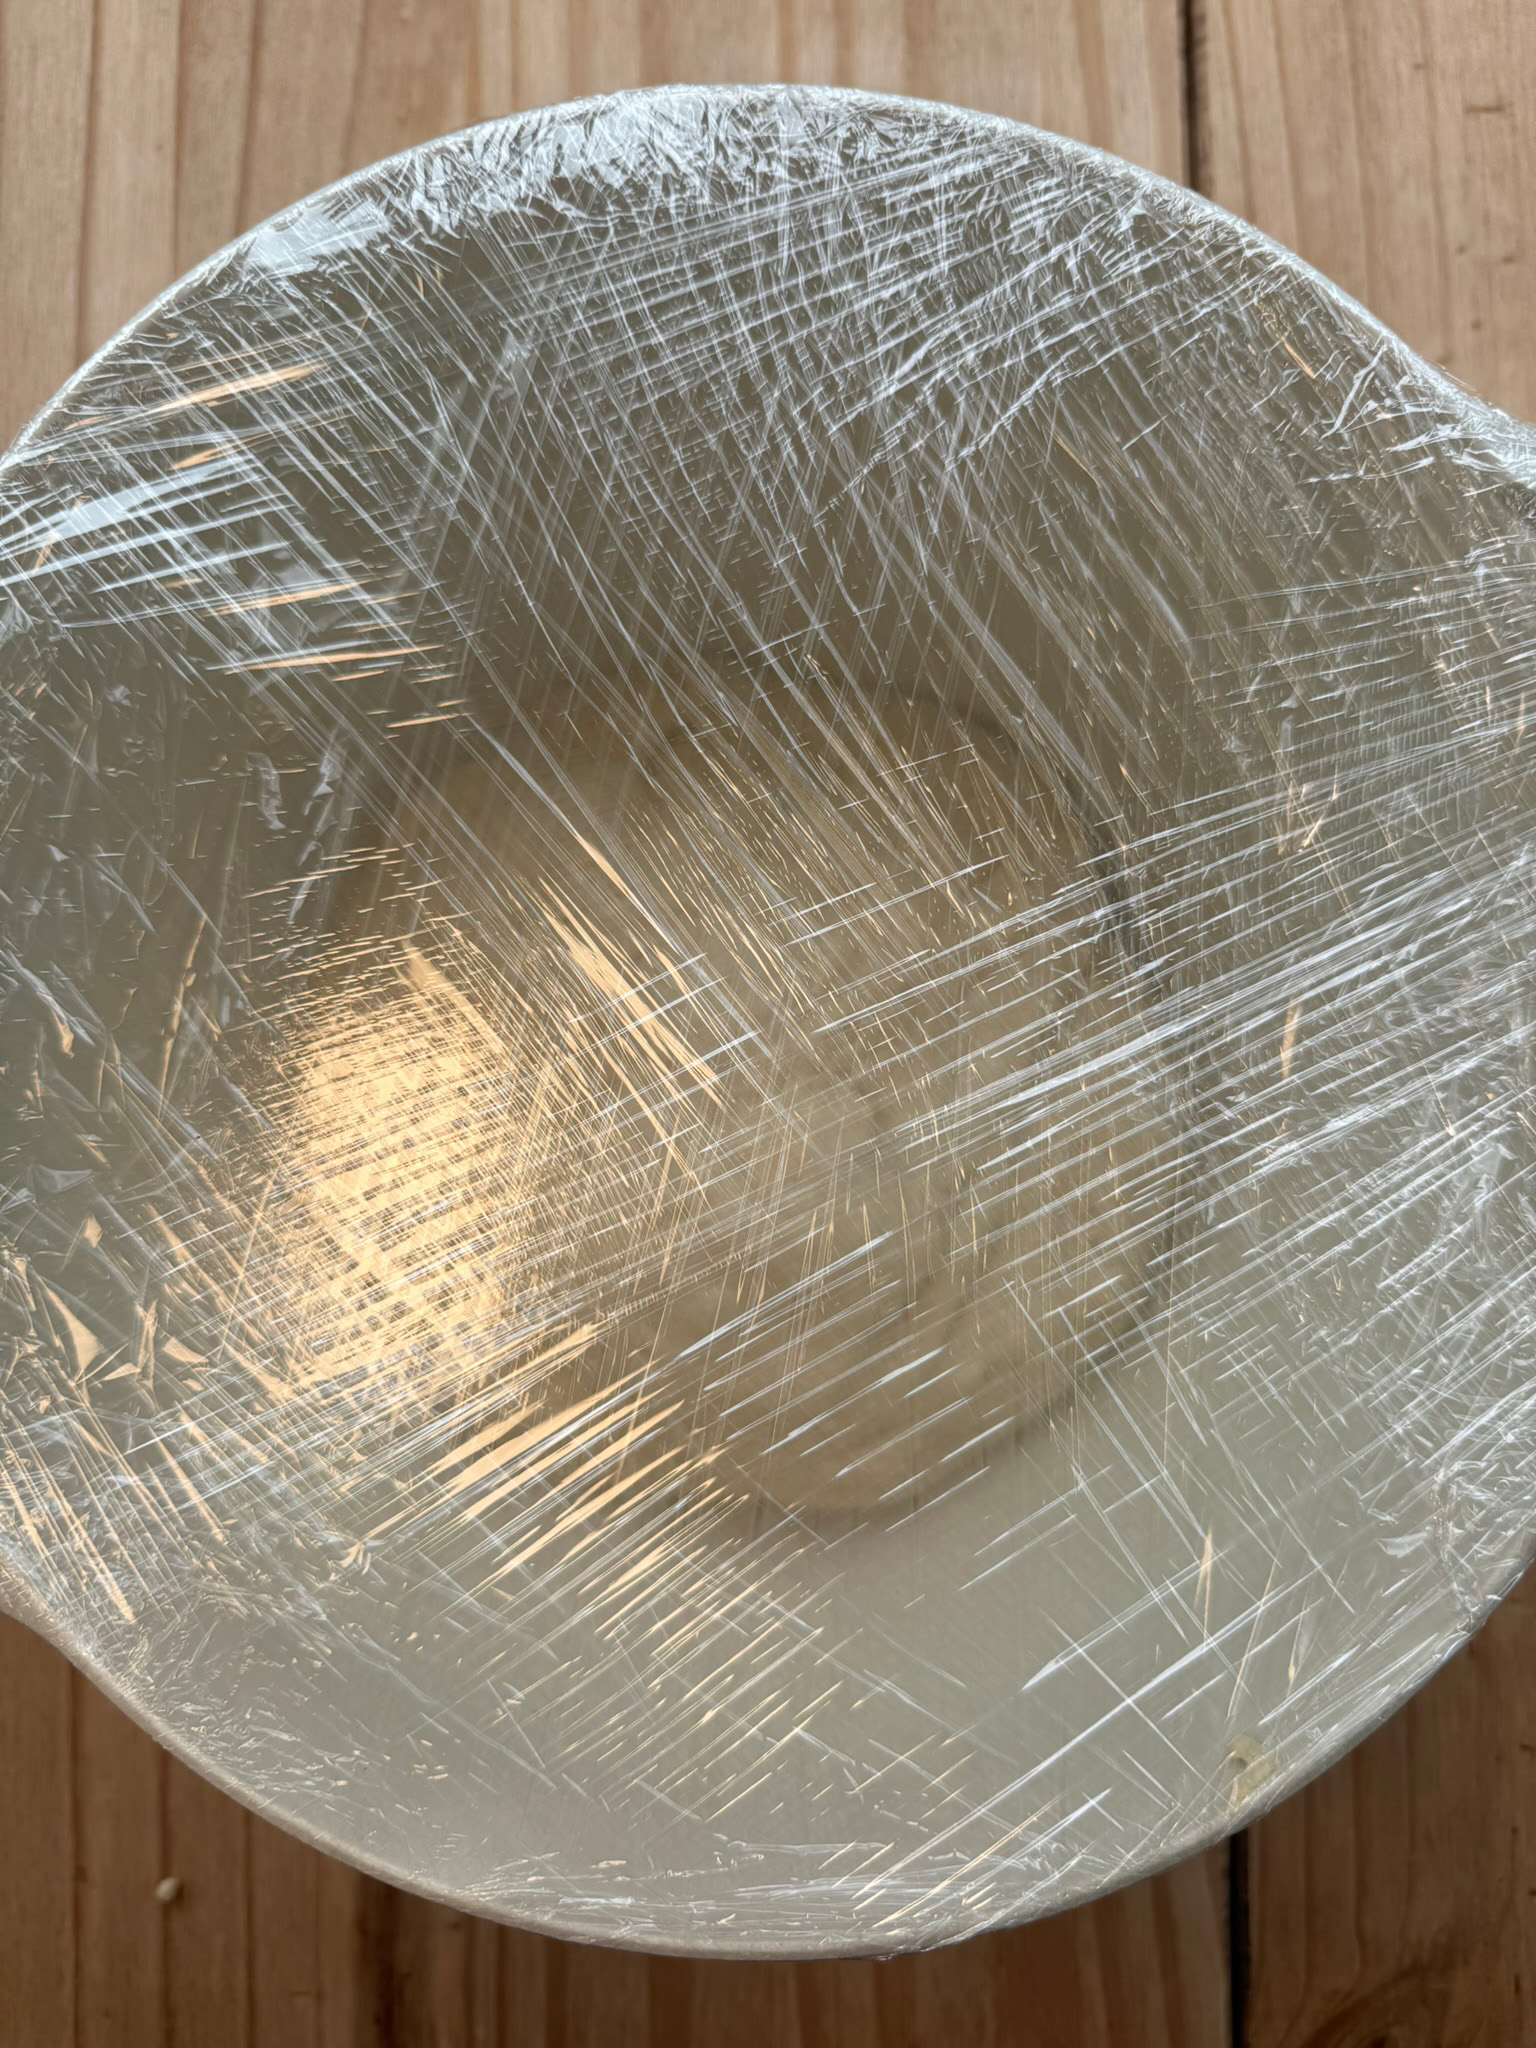
  5. Prep Your Tray:

    Grab a high-sided tray (about 31cm x 22cm), line it with baking paper and drizzle olive oil all over the base.

  6. Shape the Dough:

    Gently transfer the dough into the tray – don’t knock the air out. Press and stretch it to the edges, then cover and let it rise again for about an hour until nice and puffy.
  7. Toppings On & Dimple Time:

    Drizzle the top with more olive oil. Now get stuck in with your fingertips – dimple the dough all over. Load it up with halved cherry tomatoes, halloumi chunks, rosemary (if using), and a final sprinkle of flaked sea salt.
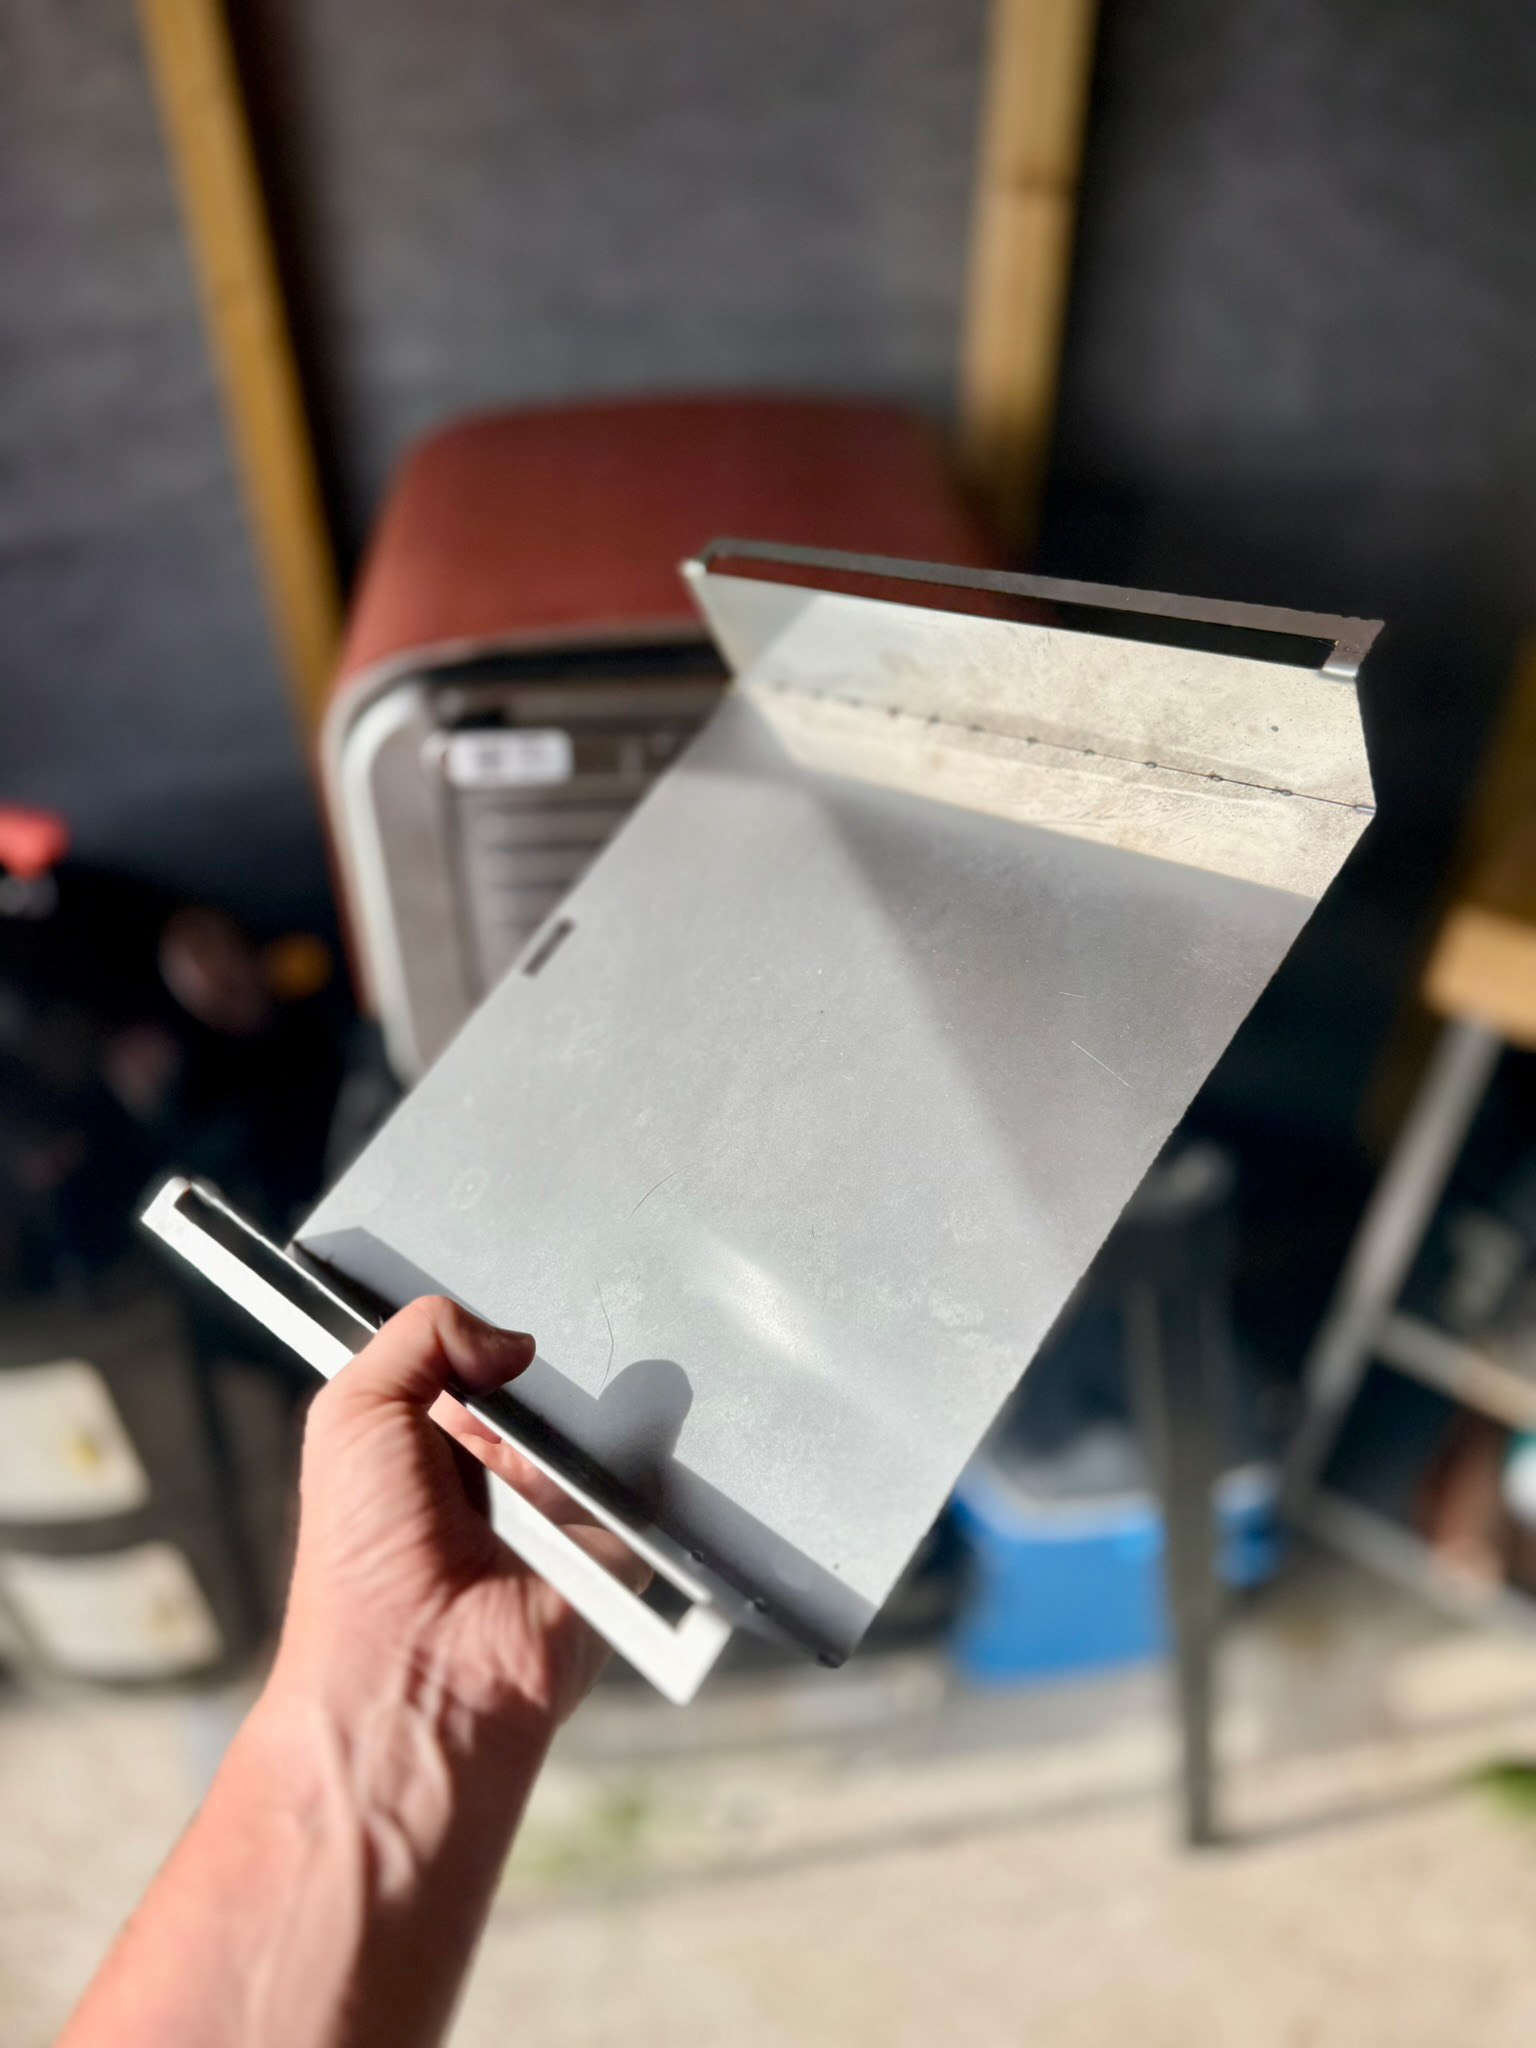
  8. Fire Up the Ninja Woodfire Oven:

    Preheat your Ninja Woodfire Oven to 230°C on Bake Mode. If you’ve got a custom deflector plate, whack it in – it’ll help stop the top from burning before the middle’s done.

  9. Bake – Two-Stage Method:

    With Deflector Plate:
    Bake for 30–35 minutes with the deflector in. Then, switch to Top Heat (Grill Mode), remove the deflector, and give it another 2–4 minutes to golden up the top.

    Without Deflector Plate:
    Just bake at 230°C for the full 30–35 minutes. If the top starts browning too fast, loosely cover with foil and carry on baking until the middle’s cooked through.

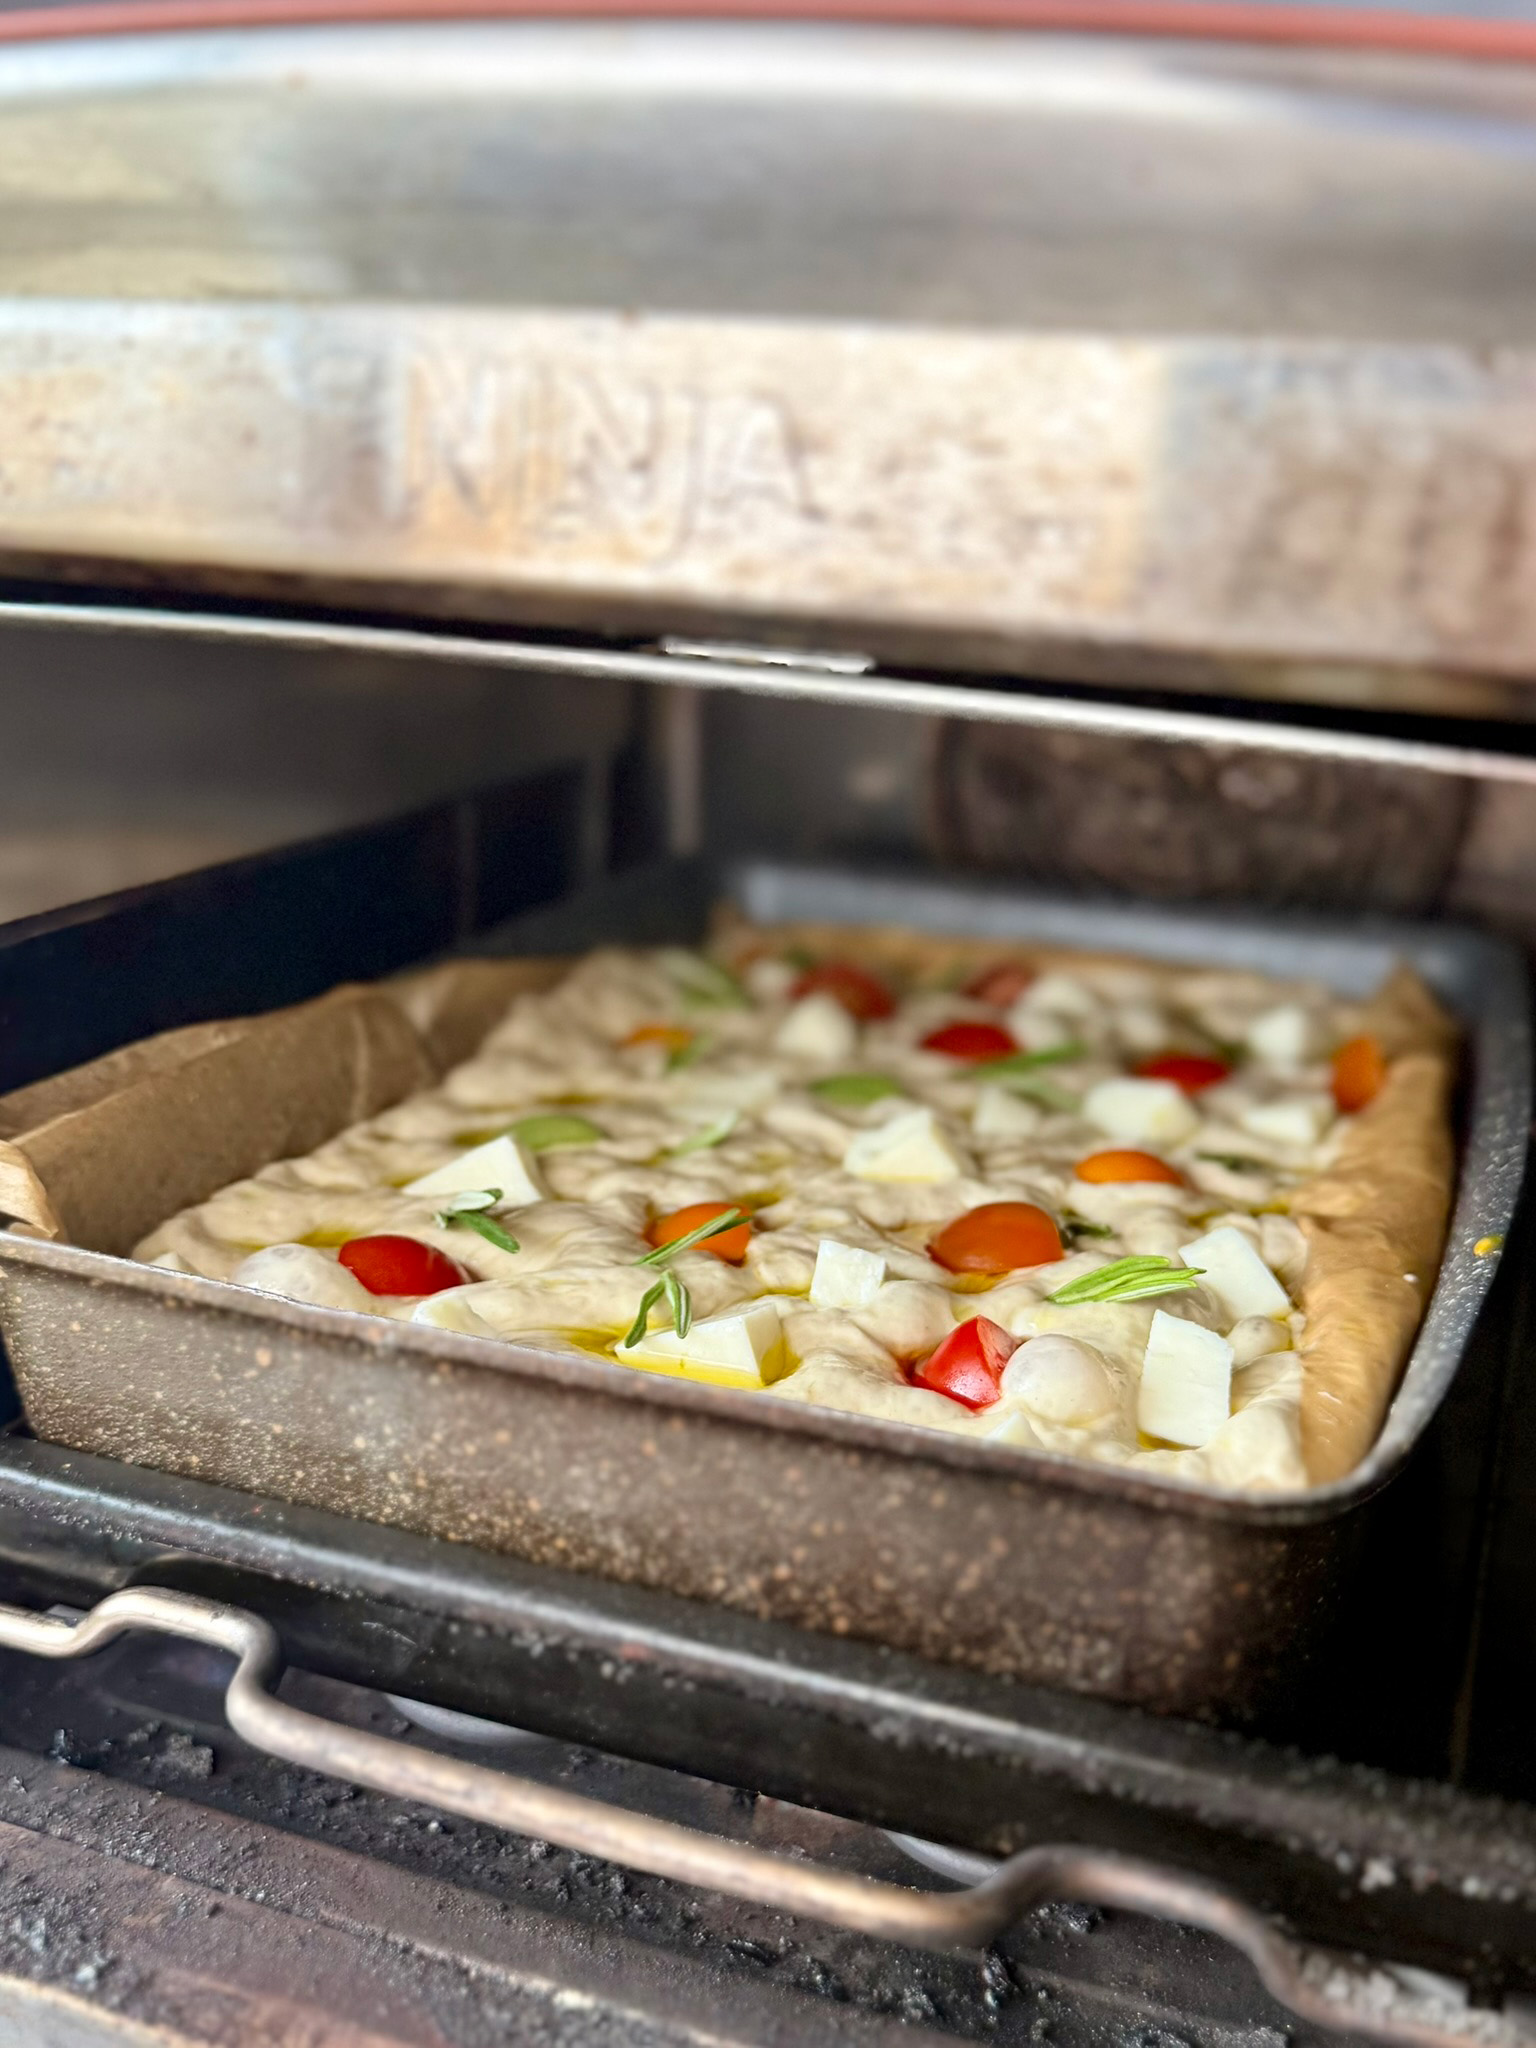
  10. Let it Chill (Just a Bit):

    Rest the focaccia for 20–30 minutes before slicing. This sets the crumb and avoids that soggy/gummy texture nobody wants.
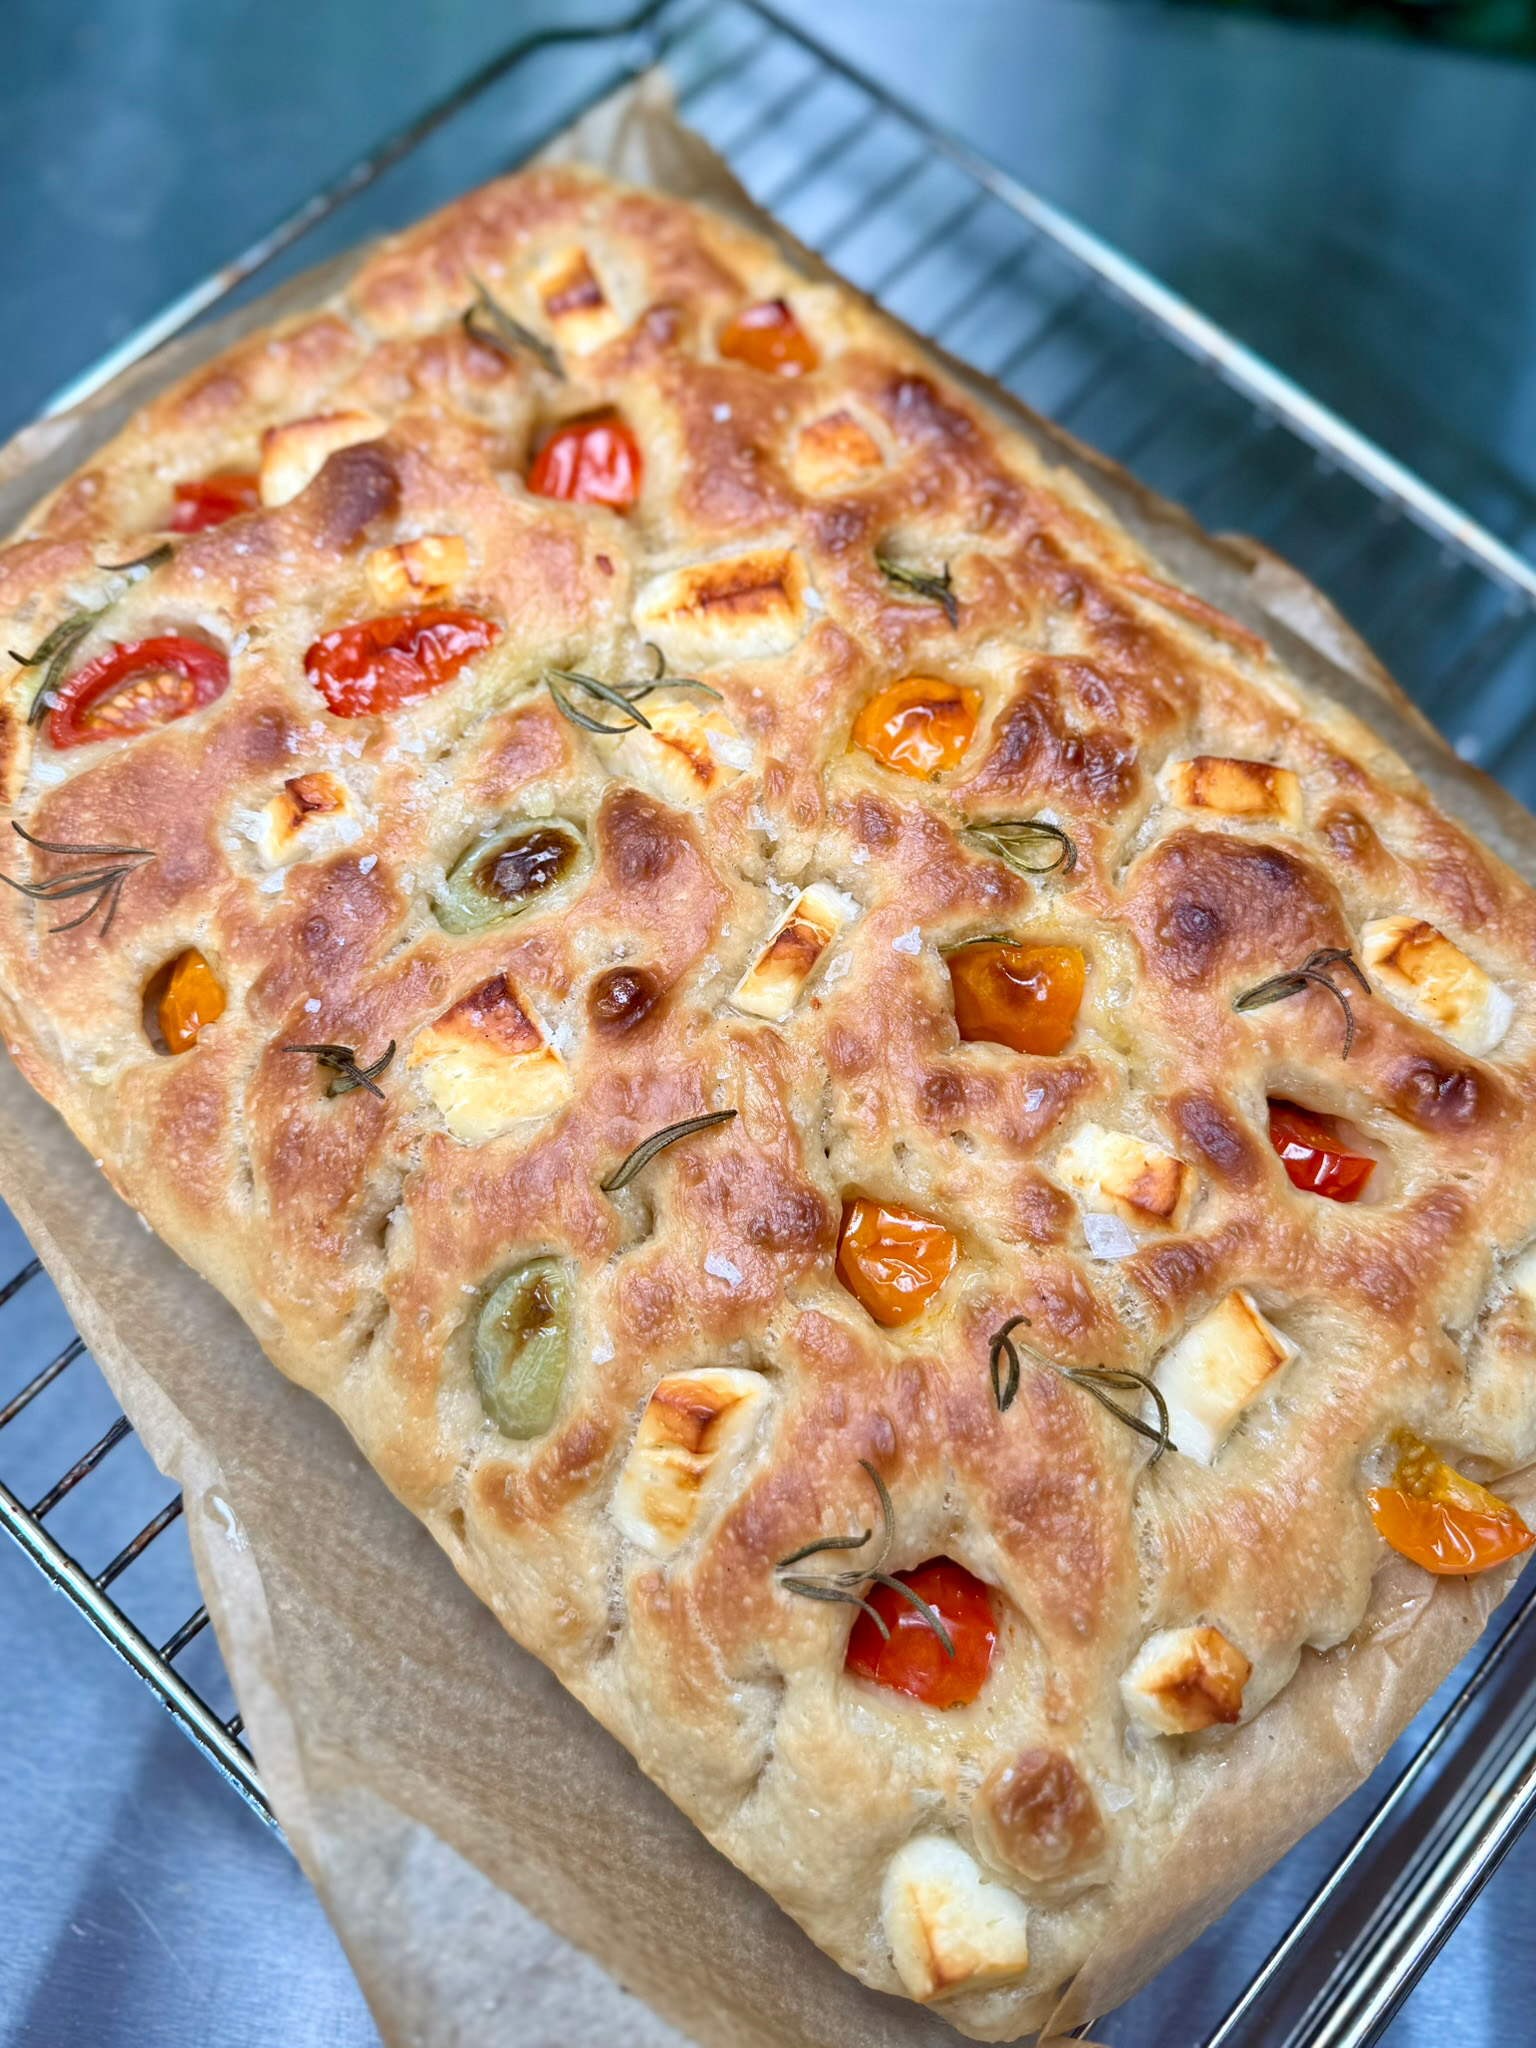
  11. Optional Finishers:

    Hit it with another drizzle of olive oil, a crack of black pepper, or a pinch of chilli flakes. Serve it straight up or go rogue and top it with pulled lamb, grilled veg, or whatever else you fancy.

Equipment

Affiliate Disclosure: This post may contain affiliate links. If you buy a product using these links, we get a commission at no extra cost to you. Your support helps keep the BBQ magic alive, and we thank you in advance!

Note

Custom Deflector Plate: If you’re using the Ninja Woodfire Oven a lot for baking, a deflector plate is a solid upgrade – it’ll stop your bread from turning into charcoal on top while the centre’s still raw.

Overnight Prove: For better flavour and texture, chuck the dough in the fridge overnight after folding. Just remember to bring it back to room temp before shaping.

Load It Up: This focaccia makes a banging sandwich base – slice horizontally and fill it with grilled meats, roasted veg, or herby yoghurt sauces.

Keywords: halloumi focaccia, cherry tomato bread, ninja woodfire oven recipe, focaccia bake, woodfire baking, halloumi bread, BBQ bread, homemade focaccia, easy focaccia recipe, crispy focaccia, rosemary focaccia, BBQ side dish
Not just cooked . . . this tomahawk was forged in fire.

Reverse-cooked low ‘n slow, then straight-up dirty seared right on the coals for that primal crust. Finished with a fat slice of cowboy butter — melted over the top with a chunk of red-hot charcoal.

Flavour? Savage.
Style? Full caveman.
Crust? Absolute filth.

👉 Full step-by-step recipe now live over on the site if you’re keen to give it a go.

www.smokeandsear.world
Too early for a Christmas-themed turkey cook? Maybe.

But with Thanksgiving just around the corner and festive planning in full swing . . . now feels like the perfect time to drop this belter.

Smoked, brined, and slathered in herby garlic butter – this wood-fired turkey’s an absolute showstopper.

Full cook on the Kamado Joe. Full flavour. Full-on festive vibes. 🎄🔥

🎥 Watch the reel
📌 Save it for the big day
🖱️ Full recipe’s up on the site now

#SmokeAndSear #ChristmasTurkey #BBQTurkey #KamadoJoe #SmokedTurkey #ThanksgivingFeast #FestiveBBQ #BBQSeason #BBQLife #TurkeyDoneRight
Right then — first brew DONE, and what better way to mark it than cooking up something to go with it 🍗🍺

If you saw my reel 20 days ago, @igulubeer had sent me their S1 Smart Home Brewing System (gifted) — and this was the moment of truth. First pour, first taste, and my first ever beer used in a BBQ recipe.

I grilled up some beer-brined, honey beer glazed chicken thighs on the @ninjakitchenuk Woodfire, dropped ’em into warm naan pockets with salad, poured over some of that leftover glaze, and got stuck in 🔥

⸻

🧂 Beer Brine:

	•	250ml cold water
	•	250ml of my freshly brewed German Helles
	•	50g salt
	•	25g sugar
	•	1 garlic clove (smashed)
	•	1 bay leaf
	•	5–6 peppercorns

Brined boneless, skinless chicken thighs for 6 hours, patted them dry, and cracked on.

⸻

🍯 Honey Beer Glaze:

	•	150ml beer
	•	2 tbsp honey
	•	1.5 tbsp French’s yellow mustard
	•	1 tbsp apple cider vinegar
	•	1 tsp smoked paprika
	•	Salt & pepper
	•	Knob of butter

Simmered until it thickened up and got sticky, then basted the chicken in the last few mins.

⸻

🔥 Cooked in the Ninja Woodfire:

	•	Grill Mode: HIGH
	•	Around 10–12 mins, flipping halfway
	•	Glazed the last 3–4 mins ’til it was glossy and banging

⸻

Served it all in naan pockets with fresh salad, poured over some of that leftover glaze, and washed it down with a cold pint of the beer I brewed myself. Not gonna lie — for a first try, I’m proper impressed 👌

The only problem? I’ve no CO2 setup yet, so the keg needs finishing sharpish . . . looks like it’s gonna be a very decent night 😂

👉 What should I brew next?

#ad @igulubeer 

www.igulu.co.uk

#igulu #iGuluS1 #gifted #bbqandbeer #firstbrew #beerbrined #stickychicken #ninjawoodfire #beerrecipe #bbqrecipe #cheekydrink #comingsoon #brewtobbq
1 year to the day . . . and I still can’t believe little old me was flown to Nashville by @ninjakitchenuk . First time in America, first time doing anything like that — honestly one of the biggest moments of my BBQ life. And yep, the FlexFlame review I wrote back then is still getting loads of daily traffic too. Madness.
Simple Beef Stew & Fire-Roasted Mash in the Kamado Joe

No thrills. No fancy edits. Just a proper wholesome family dinner cooked low and slow outdoors. Diced beef braising steak, smoked and stewed in the Smoke Pot, with jacket spuds roasted next to it and turned into mash — easy as you like.

Kept the reel as simple as the cook — no crazy angles, just real food, cooked for me and the kids. And sometimes, it’s the simple things that just hit the spot.

Not that you’ll need it, but the full recipe’s up on the website as usual 😉

www.smokeandsear.world

#SmokeAndSear #KamadoJoeCooking #SimpleBBQ #FamilyFood #BeefStew #BBQMash #OnePotCook #RealFoodRealFire #OutdoorCooking #BBQLife
Right then . . . @igulubeer got in touch and asked if I fancied giving their S1 Smart Home Brewing System a go 🍺

We had a few honest chats – I’ve never brewed beer before, but I do love trying out new gear, especially when there’s tech involved. They sent over the S1 – their latest smart brewing machine – along with a German Helles brew kit, and this reel shows the unboxing and kicking off that first ever brew.

Apparently, it takes 20 days until it’s ready to drink – so this is just the start.  There’ll be more coming soon as I pair a few brews with proper cooks off the BBQ 🔥#

Now, quick heads up – the S1 is currently out of stock in the UK. But if you like the look of it, stay tuned – once it’s back on sale, I should be able to sort you out with a cheeky discount 👀

Could this be the new bit of kit the BBQ shack was missing?

Let’s see how it turns out . . . 

What should I brew next?

#ad @igulubeer 

www.igulu.co.uk

#igulu #iGuluS1 #gifted #bbqandbeer #firstbrew #homebrewing #smartbrewer #comingsoon